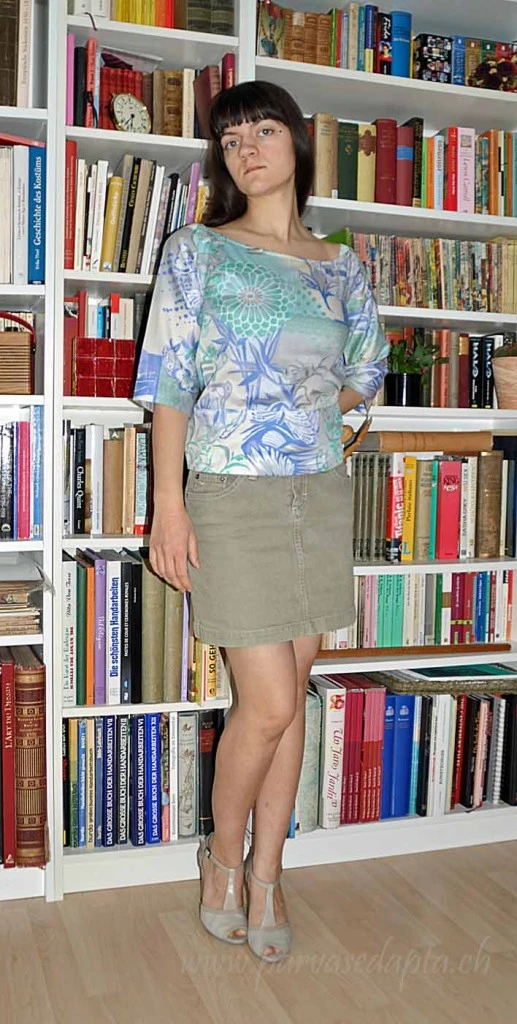
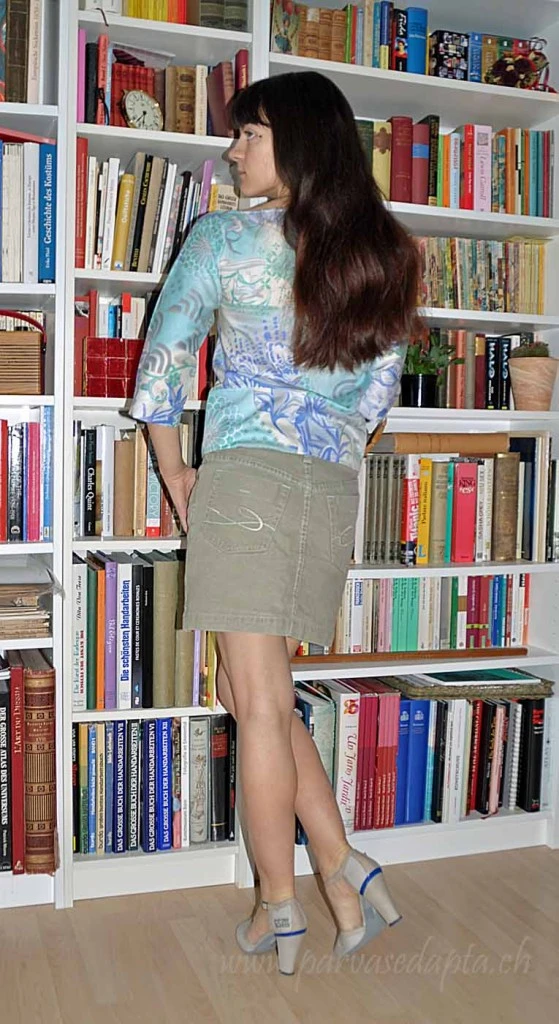
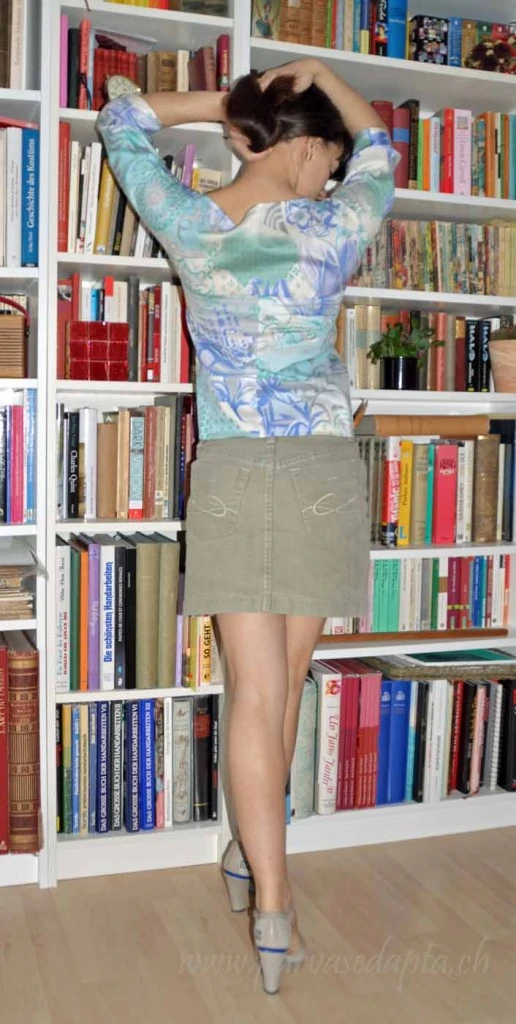
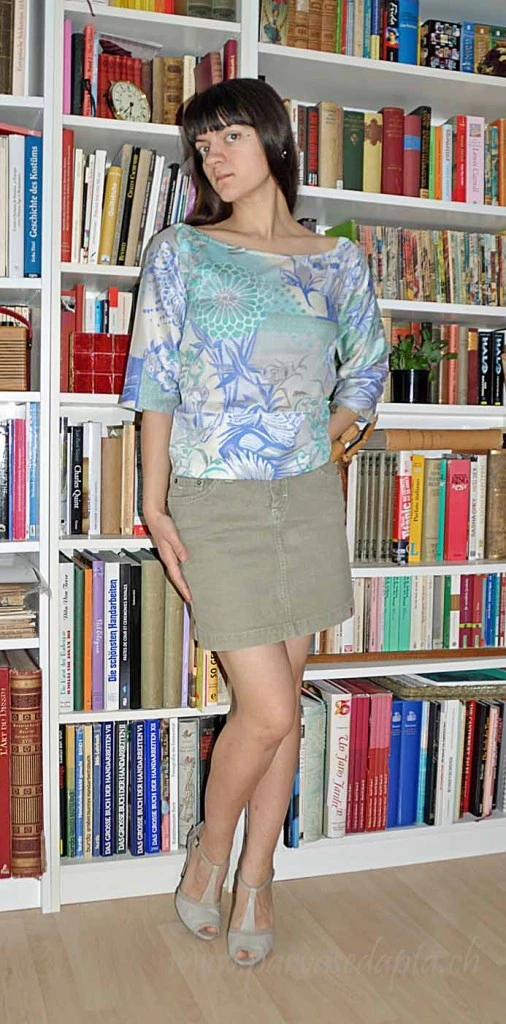
A dress…well, yes, a dress!

Besides the stacks of patterns and sewing magazines that are stored in boxes on my bookshelf, I always have a small number lying around, either because I like them and really want to make them or because these would be garments my wardrobe is lacking or that could help getting rid of some special fabric.

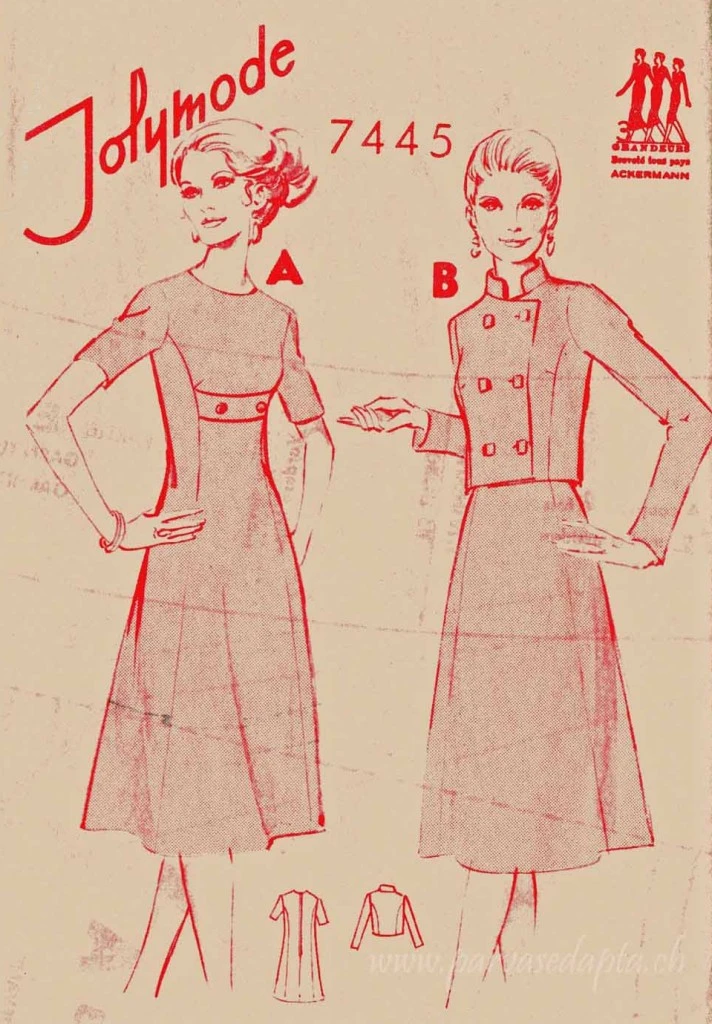
This pattern had been lying on this stack a little while. I like it because it is such a simple and yet beautiful design. It seemed to make a good wardrobe basic made from solid coloured fabric but could also be a stunning showpiece if made from an interestingly patterned one.
When the Monthly stitch challenge for February was announced I very quickly decided to finally try this one. The challenge was “solid colours” and you were given a colour depending on the first letter of your first name. My name gave me purple to work with. I had already considered trying this pattern with a very stiff purplecotton  tabby I had in my stash and now the time had definitely come.
img181wm

Dating the pattern was a little difficult. The line as such looked 60ies enough, but the length of the dress and the hairstyle looked more 70ies to me. With the help of some dear sewing-friends on facebook we settled on late 60ies for this one.
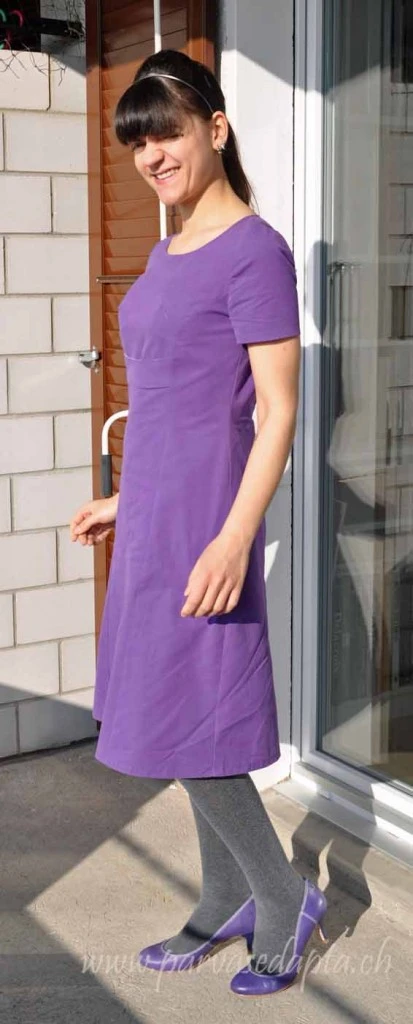
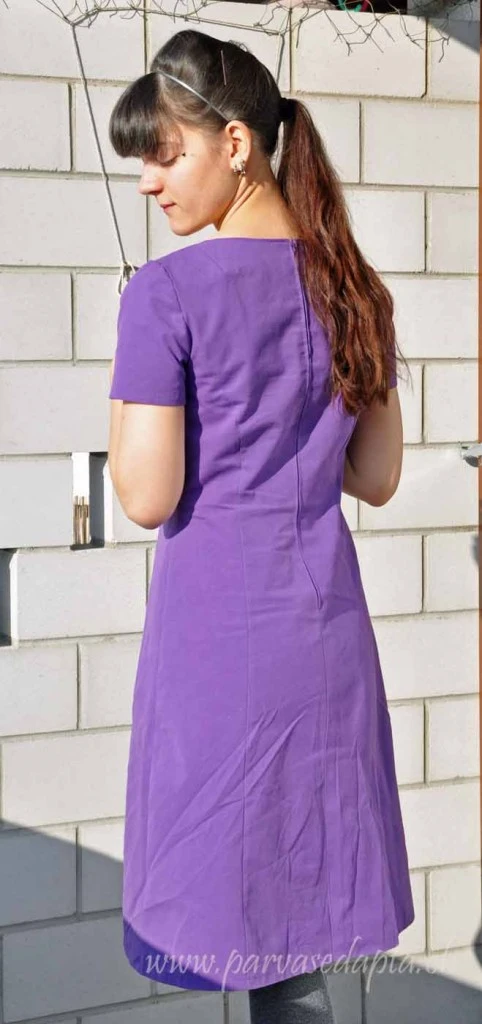
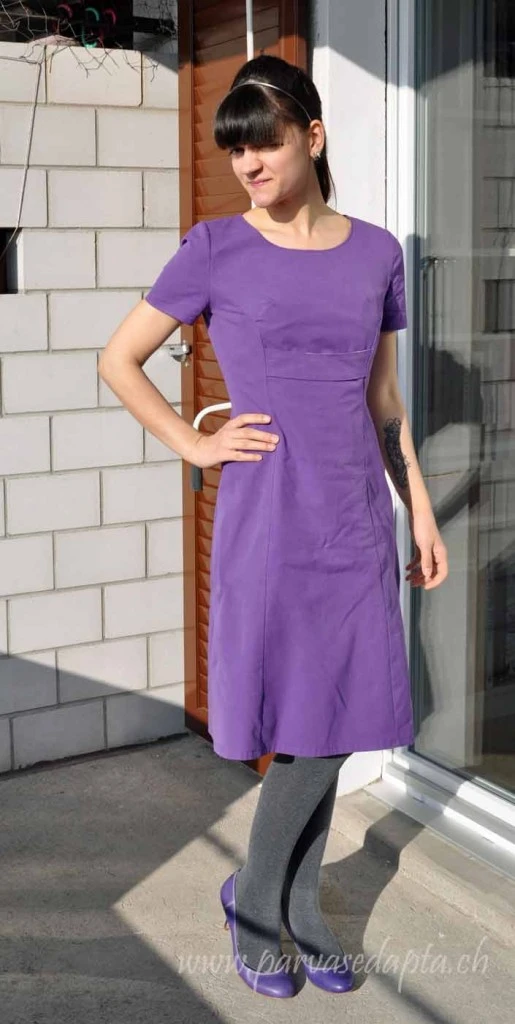
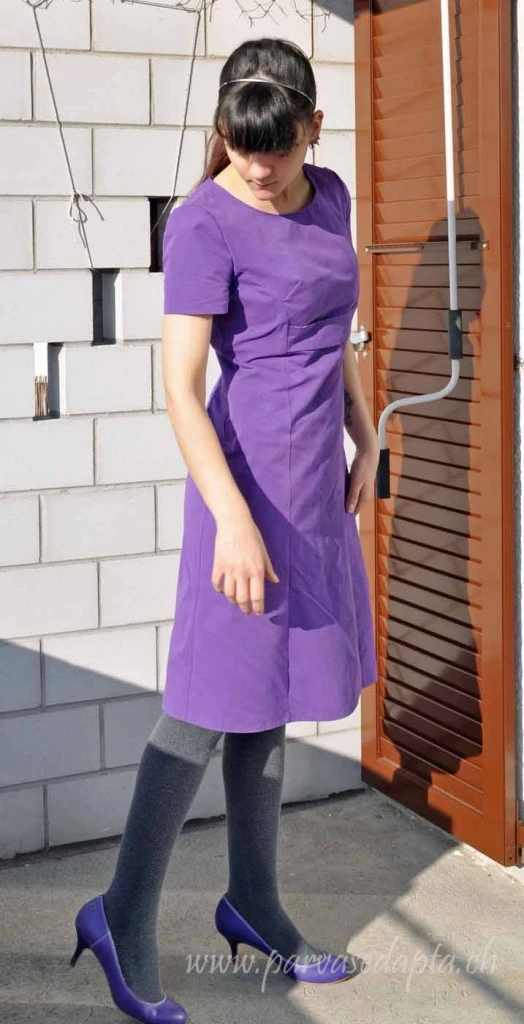
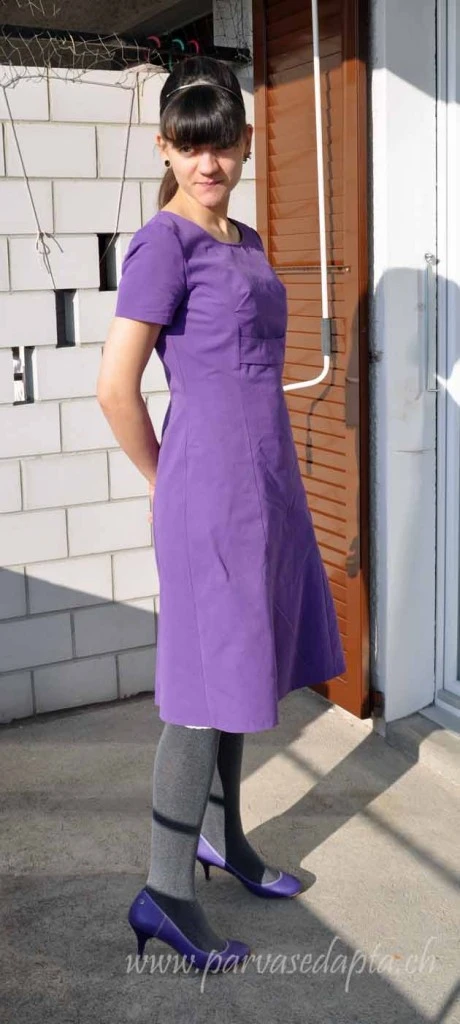
Sewing went very easy and straightforward. I cut the smallest size, which was 38, and it fit without any alterations. In hindsight I would say the bust darts could sit a little lower, but they don’t look too odd up there, so it is ok for the first try. Unfortunately it tends to climb up even higher than the bust darts, maybe this is due to the pattern or my body  needs something like a shoulder adjustment (but why didn’t I face this problem in other patterns?).
Neckline and the sleeves’ hems I faced with lavender coloured bias binding, more layers of the purple fabric would have been too thick and too stiff. The strap in the waist I faced with a cotton leftover, white with yellow flowers. Unfortunately the white is showing on the edges, I really should have used a darker shade.
The fabric was very cooperative when it came to sewing, it didn’t shift and my sewing machine coped with it very well. But the dense weave caused two problems. The first only a minor one, it was a real pain to pin it, I really had to force the pins into the fabrics and soon my fingertips hurt. The pinholes are still visible everywhere but I assume they will vanish when I wash it the first time. The second one is more annoying: Because of the density of the threads it was next to impossible to gather the sleeve caps, as the pattern demanded. Therefore I couldn’t avoid some small wrinkles when attaching the sleeves.
xxDSC_0079wm
The boyfriend kept me waiting a little while, that’s why the dress is a little wrinkled, complaints may be adressed to him.

Well, what more to say? It took me one episode of “The great British sewing bee” and a half of “Bargain Hunting” (yes, BBC-addict, I confess) to handpick the zipper, I really hope Patrick would approve, I had to use a thimble because you can imagine how painful hand-sewing is when the fabric already refuses to let pins pass through it.
DSC_0071wm

To conclude: It’s a dress! It’s funny, I like it very much but on the other hand it is so neutral. Give a child the task to draw a woman, it would draw her in a knee-length a-line dress with short sleeves and a decently-sized neckline. This dress has all a classic dress features and lacks everything that could stand out or be interesting. It really is a great basic, paired with a cardigan, a brooch and ballerinas you could do anything, from going to work to buying a house, to me it is classic everyday elegance.
DSC_0076wm

In fact, despite its vivid colour, it is a piece of cake. Which is great because as most sewers I tend to produce way more frosting than cake, which doesn’t really help to build an everyday- wardrobe. So this challenge and this pattern really helped me to produce an unexpectedly unagitated dress, well done!

Auf Deutsch

Neben den Stapeln von  Schnittmustern und Nähzeitschriften welche ich in Schachteln auf meinem Bücherregal aufbewahre, habe ich immer ein paar Schnittmuster herumliegen, entweder weil es Schnitte sind, die ich sehr dringend nähen möchte oder weil ich damit ein Loch in meinem Kleiderschrank füllen oder einen Ladenhüter in meiner Stoffsammlung loswerden kann.

Dieses Schnittmuster lag schon eine ganze Weile auf diesem Stapel. Ich mag es weil es ein einfaches und gleichzeitig sehr schönes Design ist. Es schien als könnte man damit ein schönes uni-farbenes Basis-Kleid nähen, aber ebenso einen richtigen Hingucker, wenn man den passenden Stoff nähme.
Als die Februar-Challenge bei “The Monthly Stitch” verkündet wurde, war mir schnell klar, dass ich diesem Schnitt nun endlich eine Chance geben würde. Die Challenge lautete “Solid colours”, also einfarbige Stoffe, keine Muster, keine Farbkombinationen. Die Farbe wurde nach dem Anfangsbuchstaben des Vornamens festgelegt, was bei mir in lila resultierte. Ich hatte bereits länger mit dem Gedanken gespielt, dieses Kleid aus einem eher steifen  lila Taftgewebe in meinem Vorrat zu nähen und nun schien die Zeit dafür endlich gekommen.
DSC_0074wm

Die Datierung bereitete mir etwas Sorgen. Die Linie sah mir schon nach den 60ern aus, aber die Rocklänge und vor allem die Frisuren deuteten für mich eher in die 70er. Mit der Hilfe von den wunderbaren Menschen in der “Nähen im Vintage-Stil”-Facebook-Gruppe wurden die späten 60er als wahrscheinlichstes Entstehungsdatum festgelegt.
Das Nähen ging dann schnell von der Hand, ich schnitt die kleinste Grösse, 38, zu und es passte mehr oder weniger ohne Änderungen. Im Nachhinein würde ich die Brustabnäher vielleicht ein wenig tiefer setzen, aber sie sitzen nicht viel zu hoch und sehen daher nicht komisch aus, für’s erste Mal also ok. Beim Tragen neigt es allerdings dazu, hochzurutschen, dagegen sind aber tiefgreifendere Änderungen am Schnitt nötig. Also heißt das Motto bei diesem, ja nicht die Arme bewegen. 
Weil der Stoff so steif und dick ist entschied ich mich gegen Belege und benutzte stattdessen lavendelfarbenes Schrägband am Halsausschnitt und den Ärmelsäumen. Der Riegel in der Taille wurde mit einem Baumwollrest verstürzt, weiss mit gelben Blumen. Leider sieht man ihn an der Kante ein wenig, ich hätte doch besser etwas dunkleres nehmen sollen.
Beim Nähen erwies sich der Stoff als sehr kooperativ, er rutschte nicht und auch meine Nähmaschine meldete keine Beschwerden an. Doch die sehr hohe Webdichte brachte auch Probleme mit sich. Erstens, das ist sicherlich das kleinere, es tat weh! Stecknadeln liessen sich nur mit relativ hohem Kraftaufwand einstechen was schnell zu schmerzenden Fingerkuppen führte. Zudem sieht man die Einstichlöcher immer noch, aber das sollte sich beim Waschen geben. Das zweite Problem ist etwas störender. Weil die Fäden so dicht liegen war es so gut wie unmöglich, die Armkugel einzuhalten, daher hab ich an der Naht doch einige Fältchen.
DSC_0083wm
here you see the climbing problem, up, up to the sky… hier sehr ihr das Hochrutschproblem….

Was gibt es noch zu sagen? Den Reissverschluss habe ich in Begleitung einer Folge “The great British sewing bee” und einer halben Folge “Bargain Hunting” (ja, ich schaue zu viel BBC) mit der Hand eingenäht, ich hoffe Patrick wäre stolz auf mich. Der Fingerhut war dabei mein treuer Begleiter, ihr könnt  euch vorstellen dass es sonst nicht angenehm gewesen wäre.

Zusammenfassend lässt sich sagen: Es ist ein Kleid!Irgendwie lustig, einerseits mag ich es sehr gerne , andererseits ist es wirklich sehr neutral. Es ist ein Kleid, in welchem ich als Kind eine Frau gezeichnet hätte: knielang, kurze Ärmel, runder Ausschnitt. Es hat alles was ein klassisches Kleid braucht und lässt jedes interessante Detail vermissen. Damit ist es ein sehr schöner Basis-Garderoben-Bestandteil, gepaart mit Cardigan, Brosche und Ballerinas kann man darin so ziemlich alles machen, zur Arbeit gehen oder auch ein Haus kaufen.
Damit hat mir diese Challenge sehr unerwartet zu einem  Allroundtalent verholfen, sehr gut!
DSC_0088wm

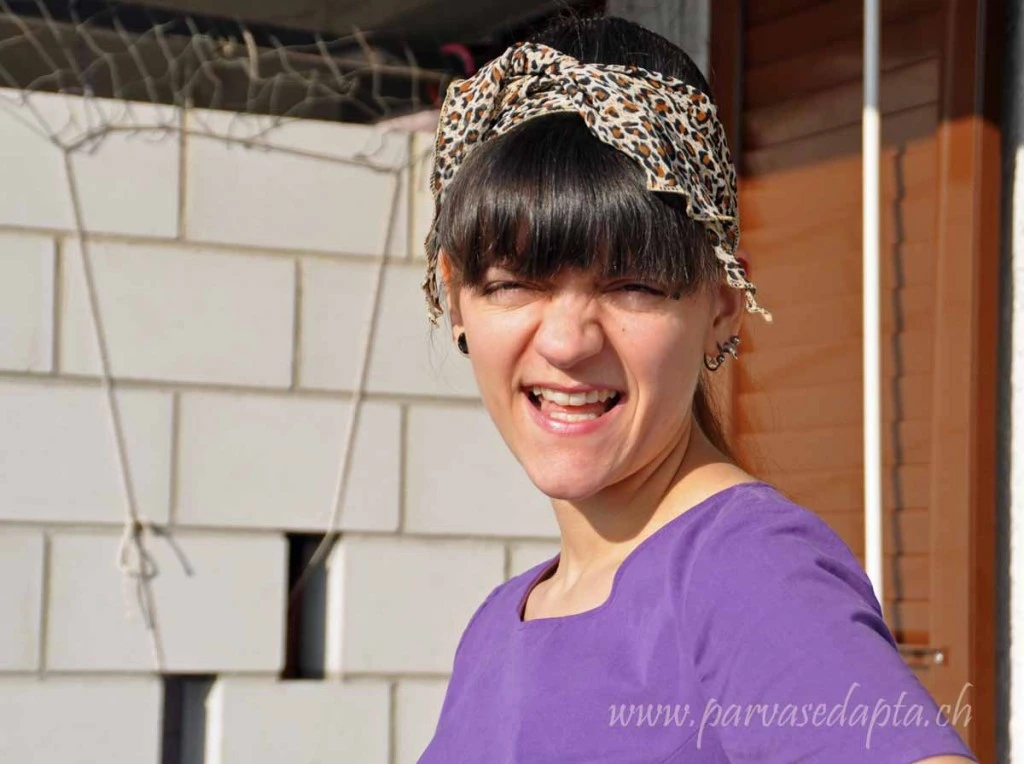
Couldn’t help, I felt like Peg Bundy with this hairdo.

Sorry, aber ich musste bei der Frisur an Peg Bundy denken.

Let’s do it the good old way

Short notice: Because the number of readers asking for a german version is increasing I will try to type all posts in both languages. Below the english text you’ll find the german one in italics.

Kurze Anmerkung: Da immer mehr Leser bedauern, dass ich auf Englisch schreibe, werde ich versuchen, alle Posts zweisprachig zu tippen. Unter dem englischen Text findet ihr die deutsche Version in Kursivschrift.

While the number of sewing machines in my posession stagnates another small collection is constantly growing. And as with the sewing machines one could argument that I only have two hands, two feet and two eyes. But, as all sewing machine collectors might know, every machine has its advantages, this one makes a perfect straight stitch, the other one is quiet, the next is useful if you want to make buttonholes and so on.

The same applies to cameras. I love how cameras from different epoches with different films make different photos. Therefore everytime I see an interesting or cute or somehow appealing camera for a good price I can’t do different but have to buy it.

At the moment I own three different types of cameras: standard 35mm ones, roll-fillm cameras and Land cameras. I am still learning and many of the photos I shoot are far from being good, but I still I like the process of photographing as such, the feeling of holding a negative in my hands, knowing this is the only copy of the moment I captured days or weeks ago.

DSC_0077

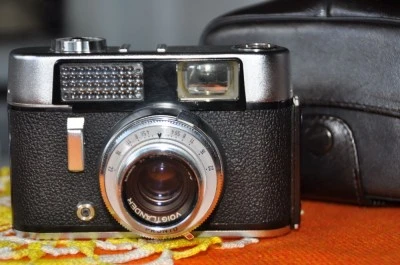
For the last few years my true compagnion has been a Voigtländer Vito CD, a camera produced from 1961-66. It is a cute camera with the big advantage of a built-in photometer. It works with standard 35mm-film, the one you can still buy today everywhere (in contrast to roll-films you have to buy in a specialized photo-shop).

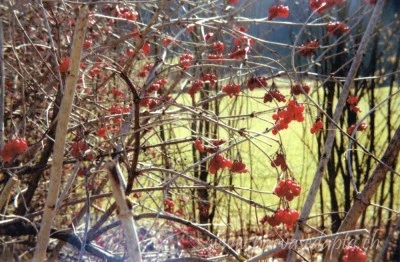
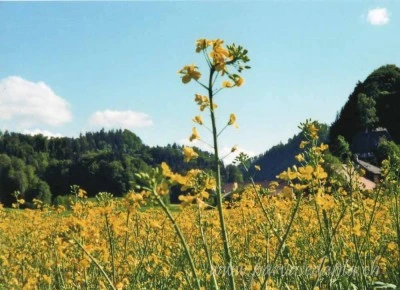
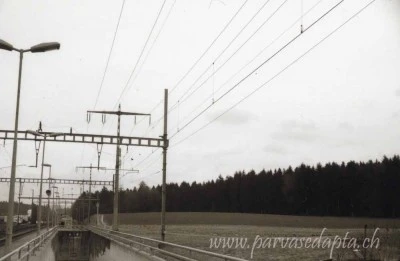
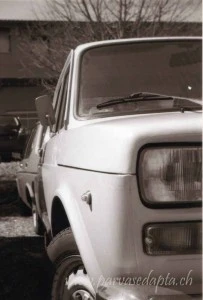
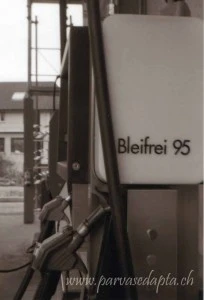
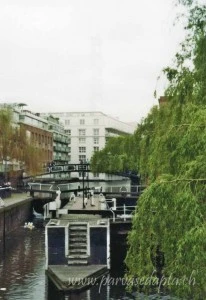
Here are some photos I shot in the two years I have owned it now. I didn’t do any photoshopping (except for the watermark), black-and-white photos were shot on black and white film.

Während die Zahl meiner Nähmaschinen stagniert gibt es da eine andere kleine Sammlung, welche stetig wächst. Und ebenso wie bei einer grösseren Anzahl von Nähmaschinen könnte man argumentieren, dass man doch nur zwei Hände, zwei Füsse, zwei Augen hat. Doch wie mir jeder Nähmaschinensammler beipflichten wird, so hat doch jede von ihnen ihre Vorteile. Diese macht einen sehr schönen Stich, die andere ist sehr handlich, die dritte ist nützlich für Knopflöcher etc. 

Das gleiche darf für Kameras gelten. Ich mag es zu sehen, wie Kameras aus verschiedenen Zeiten mit verschiedenen Techniken/Filmen verschiedene Arten von Bildern produzieren. Daher kann ich nur schwer nein sagen, wenn mich, wo auch immer, eine niedliche Kamera zu einem vernünftigen Preis anlacht.

Zur Zeit besitze ich drei verschiedene Systeme, 35mm-Kameras, Rollfilm-Kameras und Sofortbildkameras. Ich steh immer noch ziemlich am Anfang und viele meiner Fotos sind nicht vorzeigbar, aber ich mag trotz allem den Prozess des Fotografierens und das Wissen, ein Negativ in den Händen zu halten, welches die einzige existierende Kopie eines Moments ist und der nun bereits Tage oder Wochen vergangen ist.

Seit knapp zwei Jahren ist diese Voigtländer Vito CD mein treuer Begleiter. Produziert wurde sie von 1961-66. Das praktische an ihr ist, dass sie einen eingebauten Belichtungsmesser hat.
Sie frisst normalen 35mm-Kleinbild-Film, den man bis heute in der Drogerie oder im Supermarkt kaufen kann (im Gegensatz zu Rollfilmen, die es nur noch im Fachgeschäft gibt).

Heute nun ein paar Fotos, welche ich in den letzten Jahren mit ihr geschossen habe. Abgesehen vom Wasserzeichen haben sie kein Photoshop gesehen, schwarz-weiss Fotos wurden also auf schwarz-weiss Film geknipst.

parvasedapta.ch - analogue II
Schafhausen i. E.  2014
parvasedapta.ch - analogue III
Krauchthal 2013
parvasedapta.ch - analogue V
Hindelbank 2014
parvasedapta.ch - analogue VIII
Krauchthal 2013
parvasedapta.ch - analogue XII
Burgdorf castle 2013
parvasedapta.ch -analogue I
Schafhausen i. E. 2013
parvasedapta.ch - analogue IV
Kandersteg Oeschinensee 2013
parvasedapta.ch - analogue IX
Kandersteg Oeschinensee 2013
parvasedapta.ch - analogue X
Bern Meret-Oppenheim-Brunnen 2013
parvasedapta.ch - analogue XI
Hettiswil 2013
parvasedapta.ch - analogue VII
Krauchthal 2013
parvasedapta.ch - analogue VI
London, Regents canal 2013

See you soon, love,

ette

No plastic is good plastic

As you might know my blog’s title includes the motto “caring for tomorrow”. This may not become obvious or be in the spotlight in every post, but it is a very important aspect of my life.
Maybe one of the biggest steps towards a more sustainable life is to realize what plastic does to our planet and to our health and that we do good avoiding it as good as we can (I won’t go much into detail here because I don’t want to proselytise. If you want to inform yourself a quick online-seach should give you a good start) This is anything but easy, in fact so much of our daily life is made from plastic, it is next to impossible  avoiding it completely. So the best we can do is to check our every day routine, where can I avoid plastic with little effort, what can be substituted with something else and so on.

One of the easiest and yet most important things is to do without plastic bags. The vast majority of plastic bags is discarded after having been used only once. And during my years working in a bookshop I have even come across some clients who complained about being used as an advertisement panel when carrying plastic bags, really, what a first world problem! We are used to not forgetting our keys, our handkerchiefs, our gloves at home, but I always encounter the same excuse “I simply forget to take a cotton bag with me”.
Interesting how our brain works sometimes, for me it’s all about prioritising and if I don’t want to forget that bag, I won’t.

I don’t want to talk about cotton bags today, I do have too many of them and I don’t sew any more of them as long as I have all these that somehow gathered in my broom closet over the years. And yes, I do keep one with me in my handbag, always.

But sometimes, a cotton bag just isn’t the right mean of transportation. Think of berries and salad from the market or a cake from your local bakery. So when my mother asked me last year if I was interested in an old basket I said yes immediately. I had planned to get a basket for already some time, but I thought this was something I could easily find on a flea market or in a charity shop and didn’t want to buy a new one, so when my mother said she had been given this old one and didn’t need it, it was just the perfect timing.

My joy ceased abruptly when I saw it the first time:

DSC_0068wm

This was most probably the ugliest basket I had seen my entire life. That yellow stuff you see at the sides is yellow pvc-tablecloth and was supposed to cover the basket but the elastic inside was a little out of shape, so it just hung down very poorly, looking even more horrible.
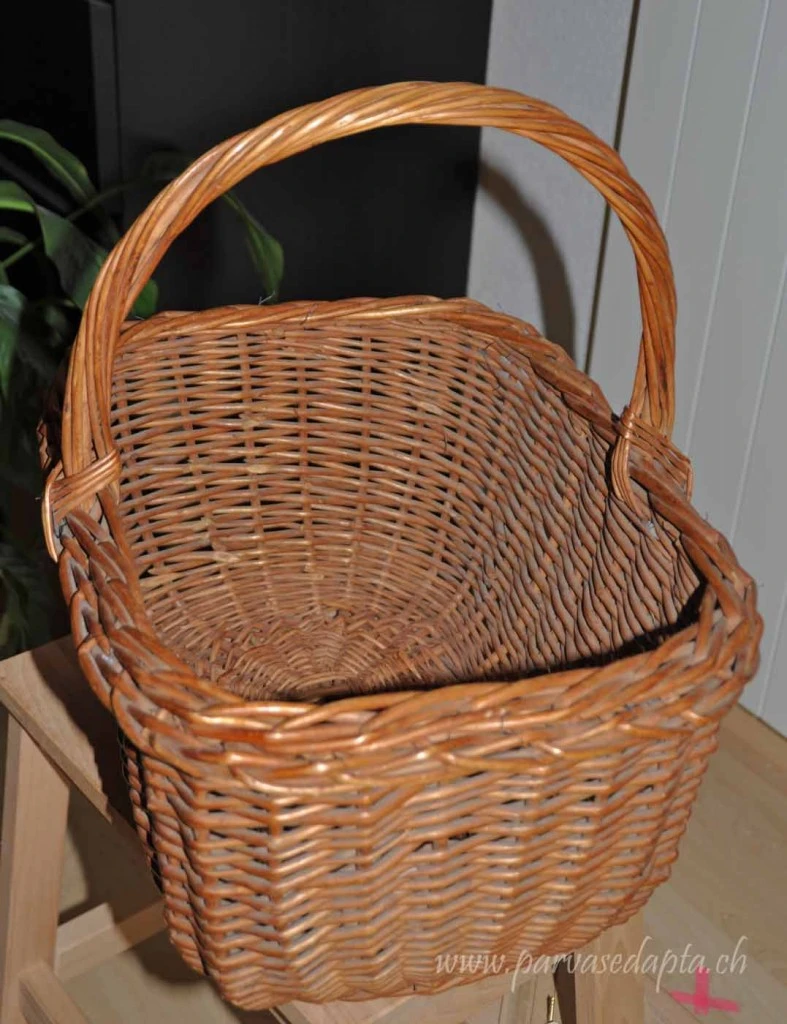
The naked basket I liked much better:

DSC_0069wm


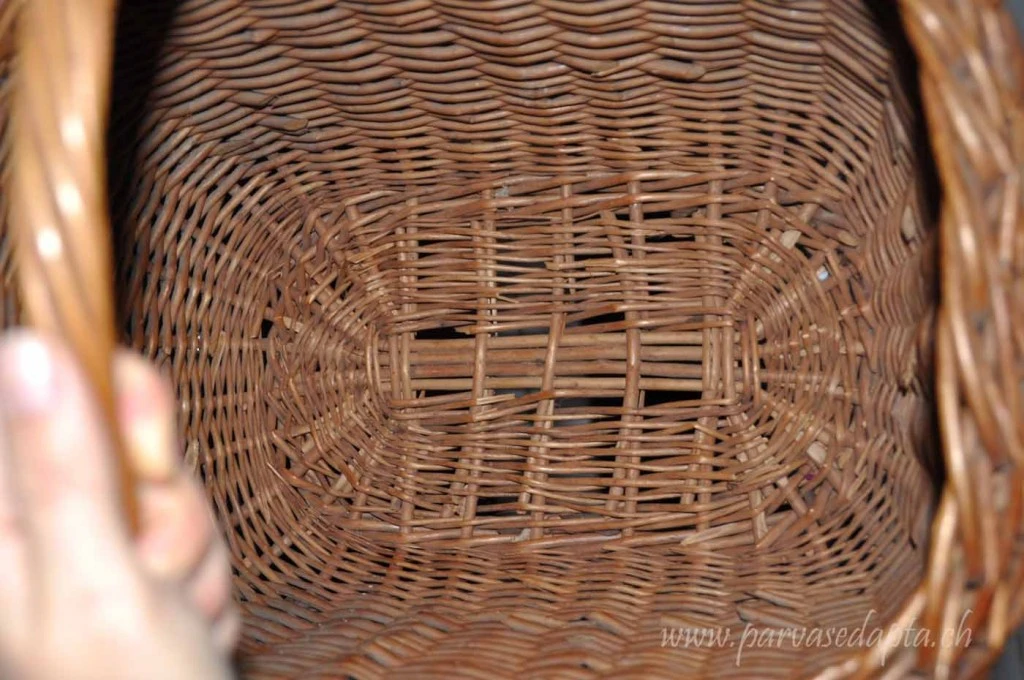
But it has a little problem: As I said, it is old. I don’t know how old, but old enough for the  material to get brittle. It still can hold weight, but the single stalks break very easily, especially at the bottom. Carrying a bottle of milk is fine, but you have to be careful not to throw anything directly onto a single stalk or it could break, therefore destabilising the whole basket. Here you see the problem:
DSC_0070wm

Well, I had two choices: Leave it as it was, knowing that the basket would be completely damaged and unuseable in the foreseeable future (and risking to cover the street with my groceries one unlucky day) or I could face and solve the problem.
You can imagine that I wouldn’t write this post if I would have went for the first option 😉

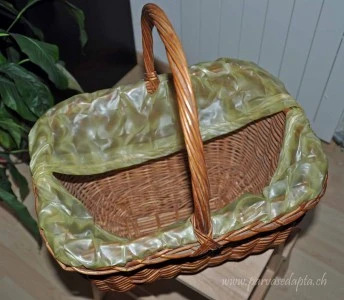
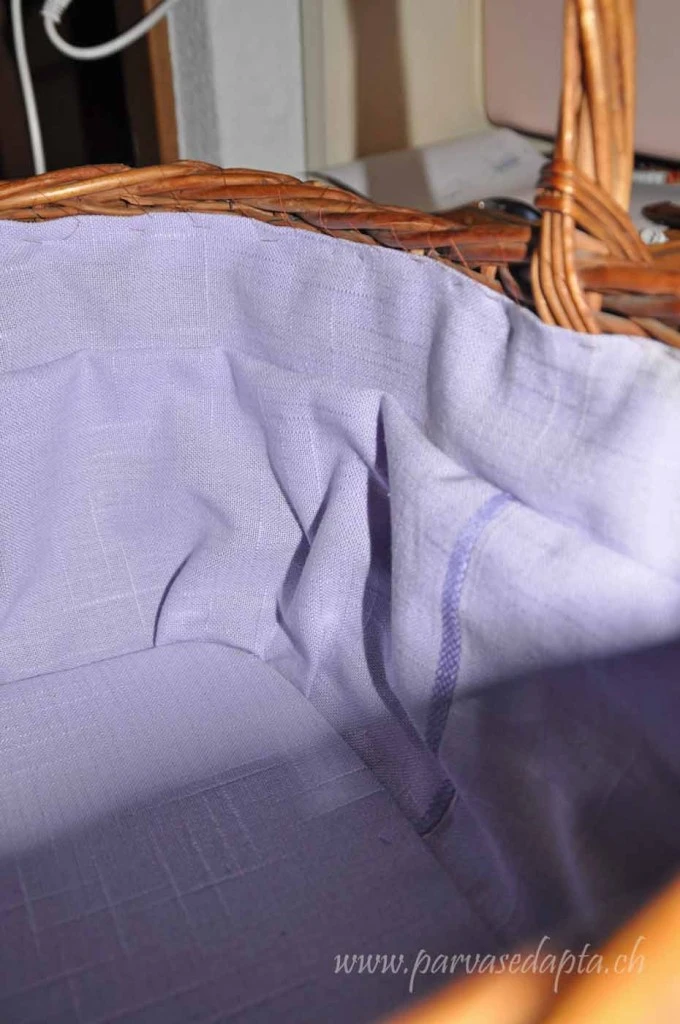
I decided to copy the pattern from the ugly yellow cover and to add a lining (could you call this a lining in this case or is there a more appropriate word?).  The bottom piece of the lining I attached to a piece of cardboard, so that the basket underneath would be protected from anything heavy falling on one single stalk.
I used an old lavender coloured tablecloth I got years ago for free because it has some stains. I wasn’t able to cut away all the stains, but they are on the lining so not visible because of the cover (and I can’t wash the lining, so it will be even more stained in the future, I suppose). The tablecloth had a darker stripe woven around the edges, some 10cm away from the hem, I placed these stripes vertically in the lining (below the handle) and included it in the design of the cover as well.

Somehow I made a massive mistake when calculating the lining, you see I had to add a quite wide strap to make it fit. Here a photo how it looked before I added the cover, you can see the dark woven stripe below the handle:

parvasedapta.ch - Embroidered Basket V
Let me tell you, sewing something onto a basket is NOT funny. I attached the lining with a straight needle and it was not easy at all, for the cover I used a curved needle. I have to admit, it worked better, but my fingers started to cramp because of the unfamiliar form. I am quite sure  that this was the first and the last basket I ever made a cover for.

parvasedapta.ch - Embroidered Basket I
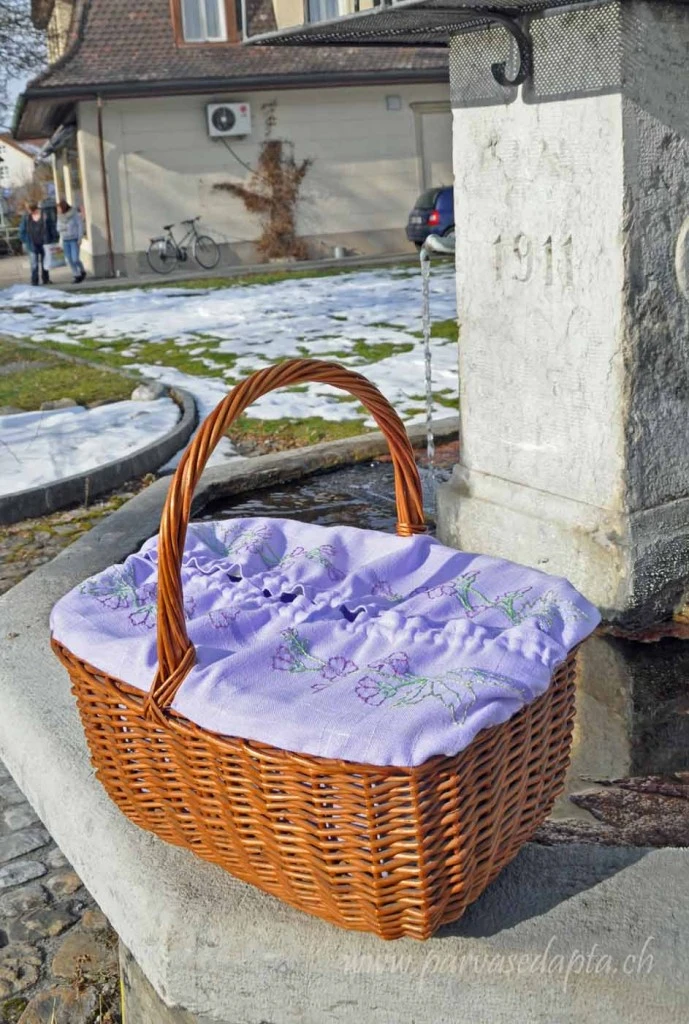
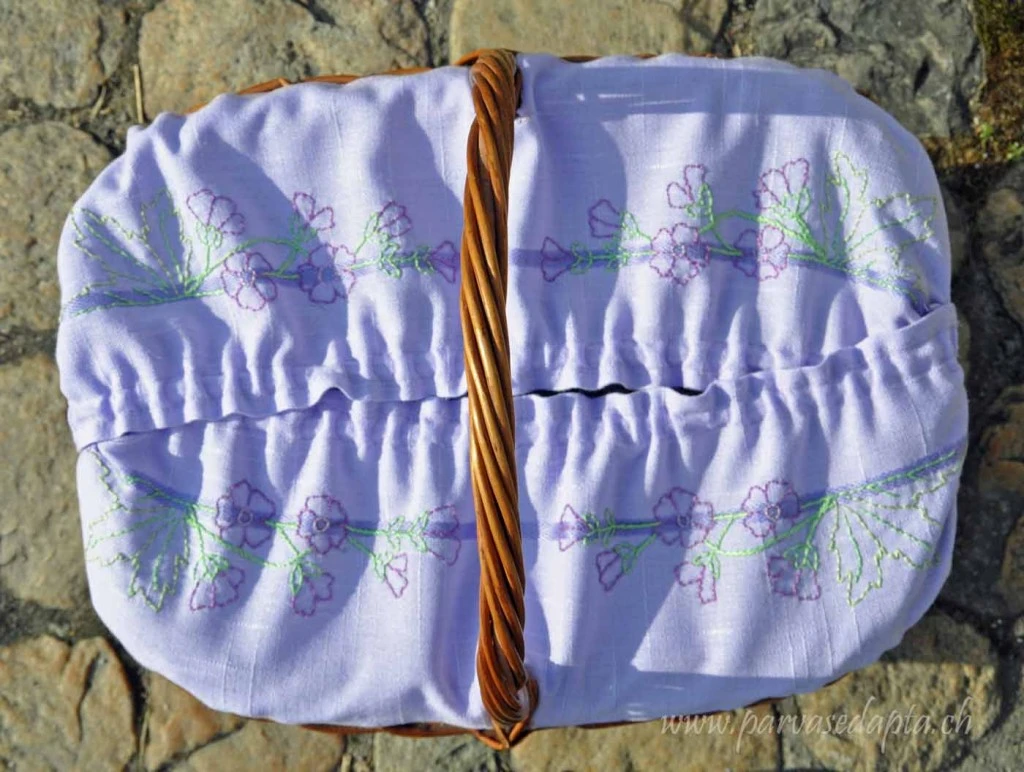
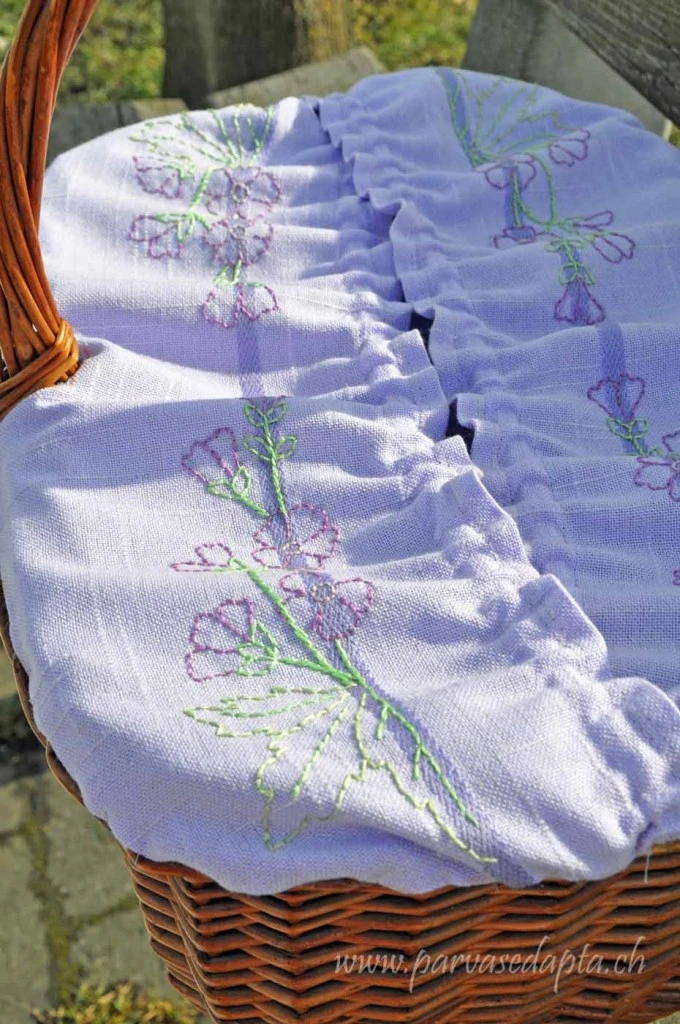
I decided to add a little embroidery to make it less plain. I went for a design I found in an early 20th century pattern sheet for machine embroidery, I already briefly mentioned it in this post. I searched for the book it belonged with (“Das Sticken mit der Nähmaschine”) online and it is dated around 1910-20 (no year was printed on it, these are the seller’s guesses) And no, I didn’t machine embroider it, but used back and stem stitches which resulted in a rather naive and plain embroidery effect, but I like it pretty much.

parvasedapta.ch - Embroidered Basket III

You can see how I included the dark stripe into the design.
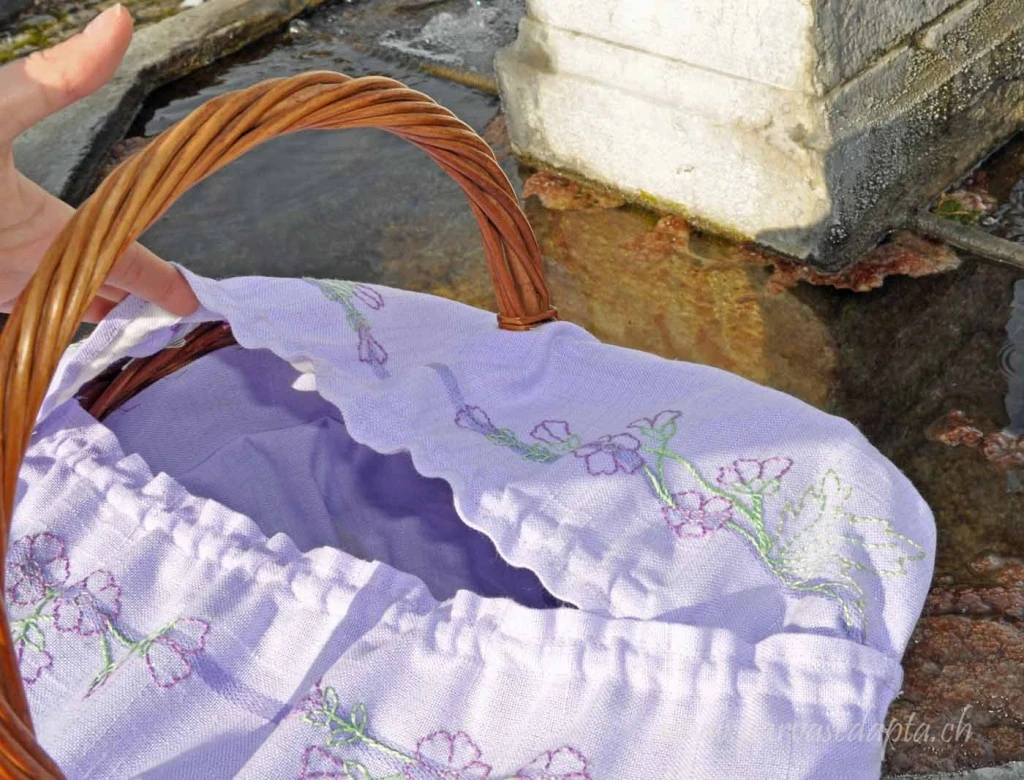
I overlapped the two sides as the yellow pvc had done also, don’t ask me why the two sides look so asymetrical, they should be identical (and it is on purpose that I didn’t put one side on top of the other, this would have looked even more odd).

parvasedaota.ch - Embroidered Basket II
The edges are the original hem of the tablecloth, on the back of it I attached some cotton ribbon to thread the elastic through. Now it closes properly again.

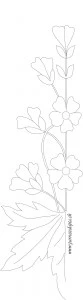
The pattern sheet I copied the embroidery from is in a very fragile condition and tears when I unfold it, so I will try to use it at little as possible in the future. The pattern I used for this project I had traced onto tissue paper. To keep it, without manipulating the pattern sheet again, I digitalized it. And because I am so kind I will share it with you, klick on the image to enlarge it (and tell me when you makee it, I am curious to see your version):

parvasedapta.ch - embroidery pattern


I like the result very much and love to take it with me to the market. And though I know I won’t try to sew with baskets again, it was well worth the effort.
parvasedapta.ch - Embroidered Basket IV
See you soon, love,

ette


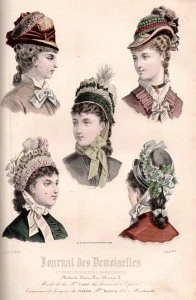
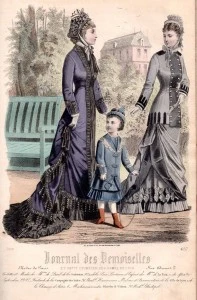
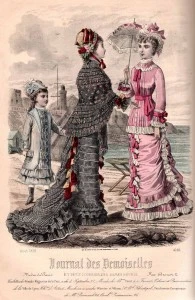
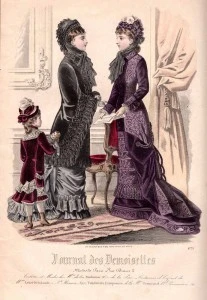
Journal des Demoiselles 1878

Already a while ago I was asked if I would like to share some of the old fashion plates I have.
Of course I would! Unfortunately most are too large for my small scanner and I don’t want to damage them, but I do what I can. Additionally you can already find so many scans on the interweb, so if you are searching for good scans you might want to check if someone else already uploaded what you are searching for.

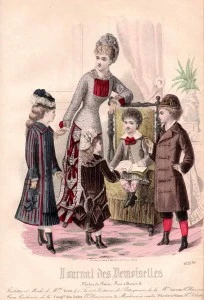
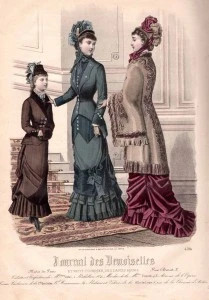
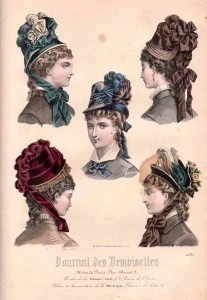
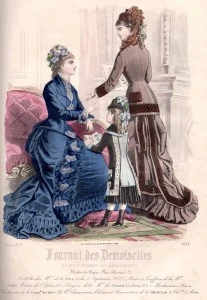
Here are the colour plates in my “Journal des Demoiselles” from 1878. Unfortunately some are missing, you can find all plates (and the text as well) here.

parvasedapta.ch - Journal d Demoiselles 1878 VII parvasedapta.ch - Journal d Demoiselles 1878 VIII parvasedapta.ch - Journal d Demoiselles 1978 V parvasedapta.ch - Journal d Demoiselles 1878 I parvasedapta.ch - Journal d Demoiselles 1878 II parvasedapta.ch - Journal d Demoiselles 1878 III parvasedapta.ch - Journal d Demoiselles 1878 IV parvasedapta.ch - Journal d Demoiselles 1878 VI


I hope you like them, see you soon,

ette

Only 316 days to go

Deutsche Zusammenfassung s.u.

Third 20ies-post in a row, hope you won’t get bored? 🙂

Well, some time ago there was a Sew-Along. Its aim was to sew a dress. Not just any dress, a Christmas-Dress. Yes, I am talking about the Weihnachtskleid-Sewalong. It’s been a while 😉

My last post with this tag dates from december 15th, nearly two months ago I’m afraid. At  that stage my dress was far from being finished, the top wasn’t attached to the skirt, sleeves and all the little velvet things like collar and jabot I hadn’t even thought of. But despite my motivation was as low as you could imagine, I did work on the dress and many little steps took me to finally finishing it already one month ago. The first photos of the finished dress (on my dress form in a bad light, you see some of them further down) date from january 10th, so apparently I was already done then.

But it took me until last wekend I finally found the time and the right weather to make some proper photos of it. Or maybe it was again a matter of not-wanting?

You may wonder why. Why didn’t I want to be finished by Christmas when I had the chance to? Why wasn’t I eager to photograph my first ever 20ies sewing project?
Maybe because, the closer I got to the finishing line, the more I realized this was in no way going to work.
The fitting issues were all dealt with, the plaid sewing went without any difficulties, there were no catastrophes, no sewing-machine-breakdowns, no seam-unpicking, no shortage of fabric nothing. What happened?

Well, I should have known earlier: What comes to your mind when thinking of the 20ies? Simple but beautiful styles, quiet and yet eccentric fashion, quality materials, sophisticated cuts, for me the Twenties are pure, calm elegance.
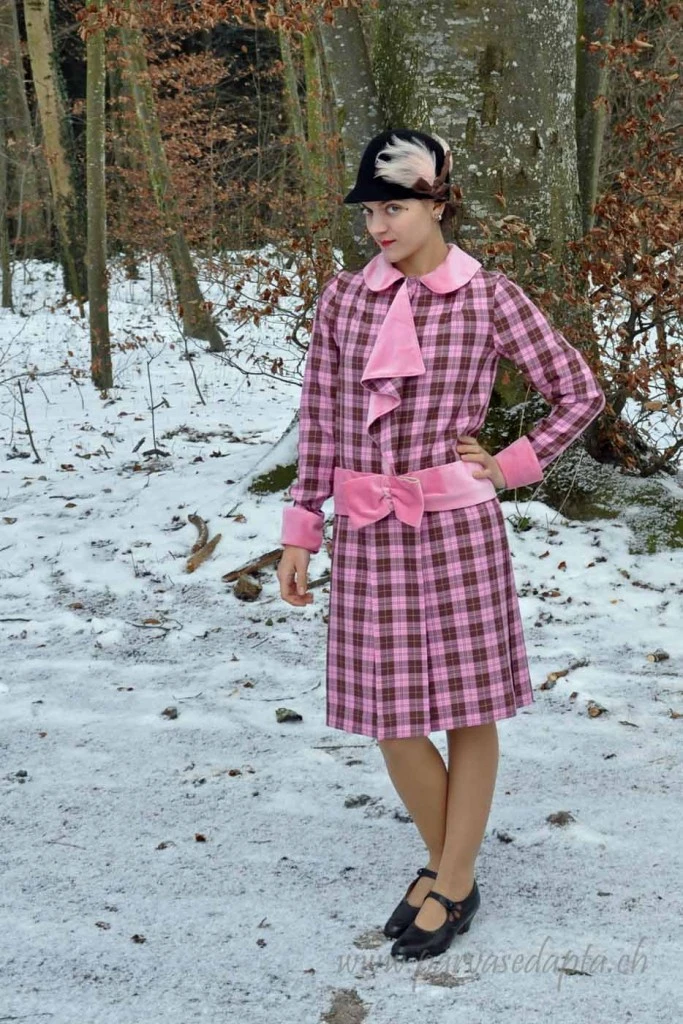
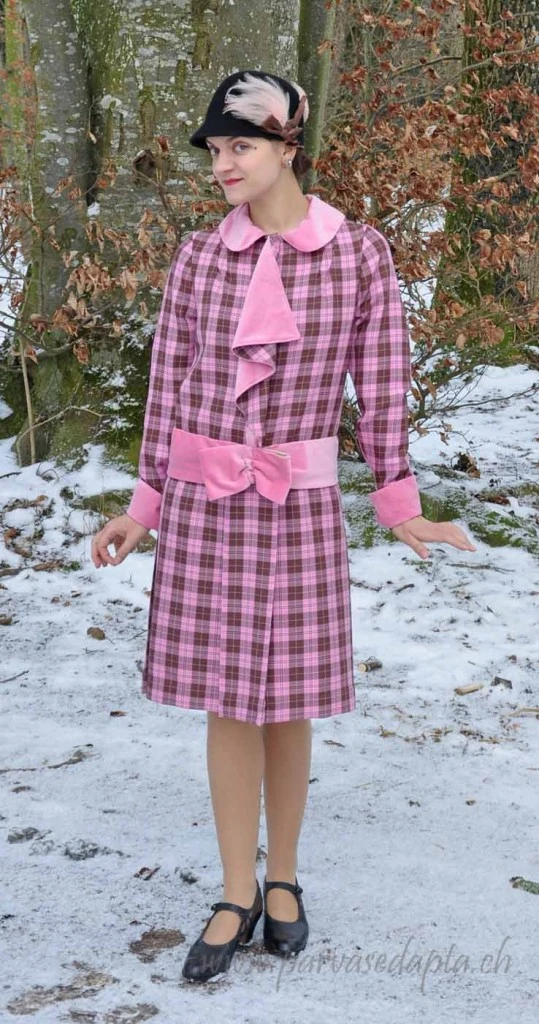
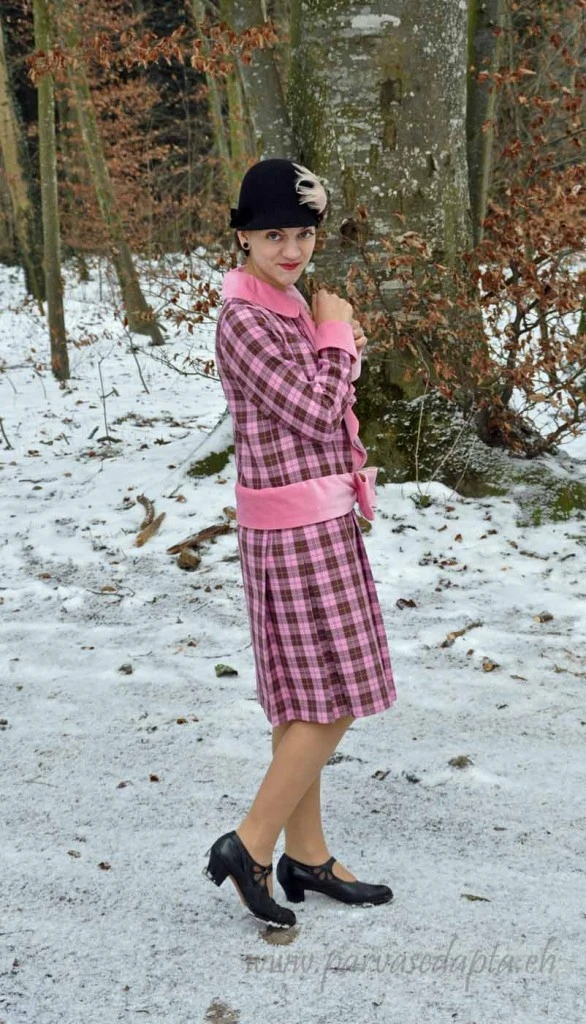
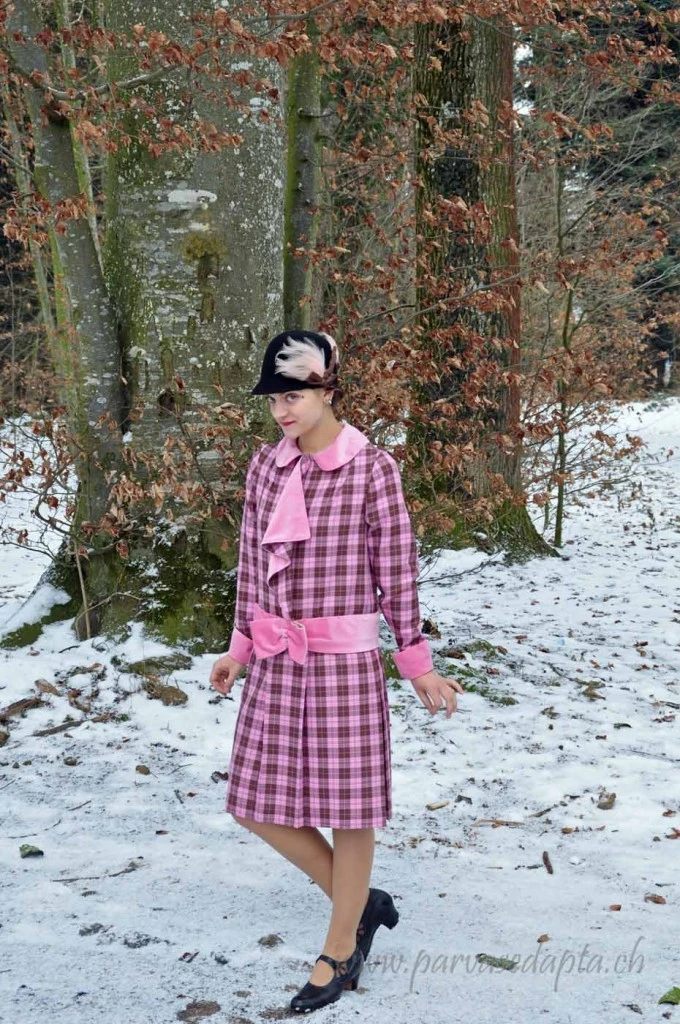
And what did I chose? A dress with Peter-Pan-Collar and jabot in piggy-pink-velvet! Pardon!? What was I thinking? This isn’t elegant, this is ludicrous!


DSC_0079wm

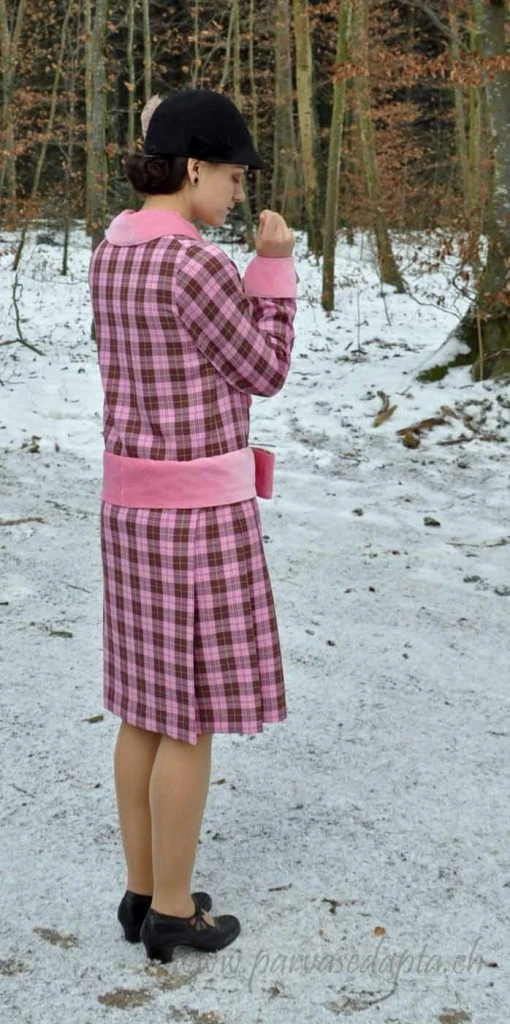
See? It is a 20ies dress, no doubt it is. But this is a dress you can wear when welcoming your in-laws-to-be when trying to convince then that you aren’t a naughty flapper-girl, but well behaved and boring, far away from anything scandalous.

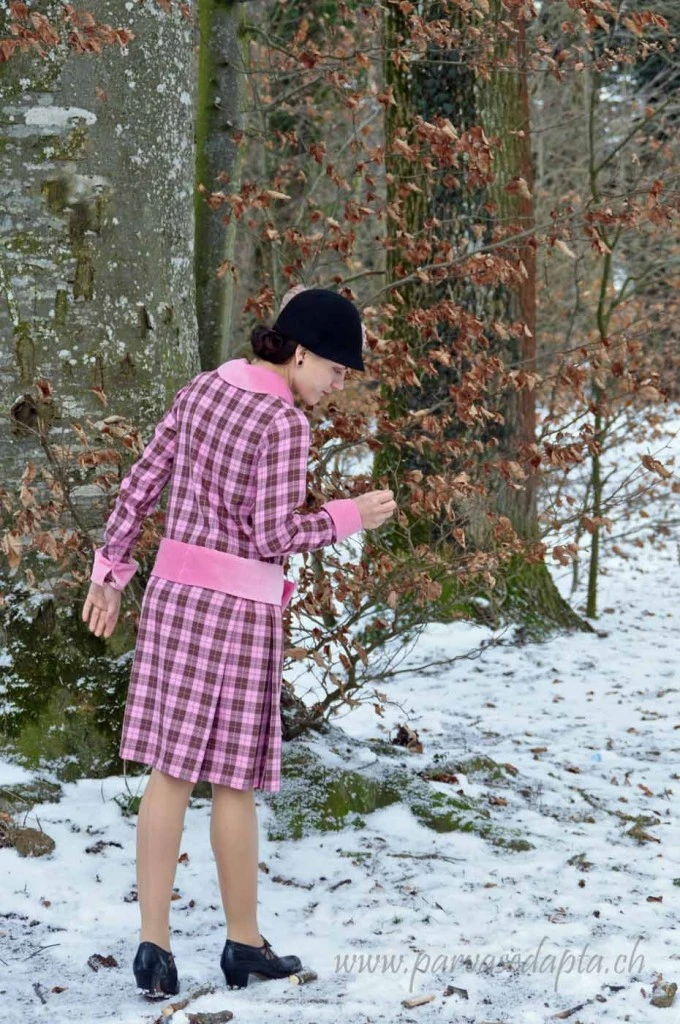
And for me this is far from being wearable outside a fancy dress party. This has nothing to do with elegant 20ies silk chiffon show-more-than-you-conceal-dresses that would force people to stare with their mouths open, this is a cute little period dress, optionally worn by the well-mannered daughter or the old maid left on the shelf in a clichéd play, though I should have left the skirt a little longer for these two.

DSC_0085wm

And this means as well that for me there was no way I was going to wear this on Christmas Eve. My boyfriend still can’t stop laughing and shaking his head when he sees me wearing this.

DSC_0081wm

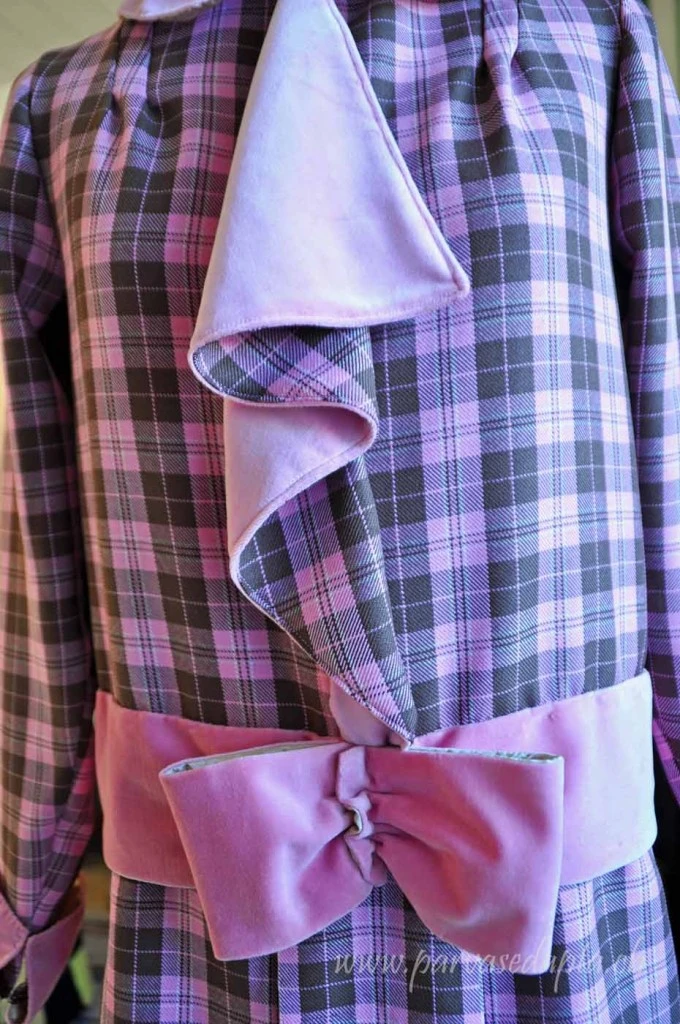
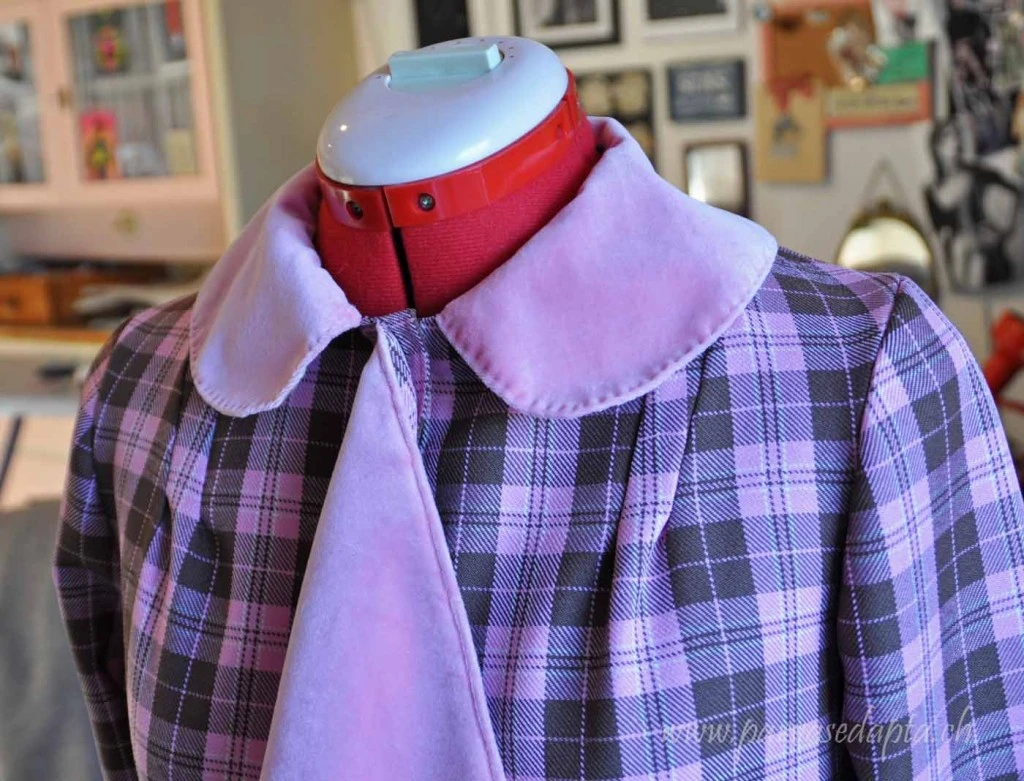
Now, after having said all this, let’s talk about the dress a little. Despite the fabrics being not correct at all, I tried to stay as close as I could to the original. All seam allowances on the inside are pinked, the waist seam is covered with a grosgrain ribbon. I used no interfacing, therefore the cuffs are a little on the floppy side, the sleeves close with hooks and eyes beneath the cuffs. The front closes with press-studs underneath the jabot.

DSC_0063 (2)wm

I had initially planned to make the jabot from the plaid fabric. Only later I saw that it was meant to be made from the second fabric. Because the back of the velvet isn’t that attractive I doubled it with the plaid. As you can imagine this resulted in a very stiff jabot, the nice drapery look above is completely fake, everything is sewn in place to make it appear as it does.

DSC_0062 (2)wm

Collar, cuffs and belt are lined with a champagne-coloured poly-whatever-lining-fabric, while the topstitching on the jabot is made with the machine, on the cuffs and the collar I used hand-stitching, as visible above.

DSC_0076wm
this is in fact an outtake, I was closing my cuff at that moment

The skirt was meant to be a little wider than the bodice. I tried to gather as much width as I could without being visible as gathers in the front and back, the rest was put to the sides, so the side panels do appear a little gathered, but I like this effect (and it is very common for 20ies dresses to have gathers or pleated panels at the hips, so maybe even wanted).
And because it had always been too large and too long during its creation, I somehow overdid it and now the skirt is a little on the short side. But I admittedly was too lazy to unpick the hem with all the pleats so I’ll leave it like this.

DSC_0078wm

Well, consider the Christmas-Dress-chapter closed.

I don’t know what I will do with this dress. In a few days there is carnival in Switzerland, though I normally avoid this event, at least I would have a fancy dress to wear if anybody forces me to go.

DSC_0082wm
hat: New Yorker – feathers on the hat: antique/flea market – dress: ette after a 1920ies pattern – stockings: Ars Vivendi – shoes: flea market

Now, what do you say to this pink square frumpy whatever?
And to stay with the sew-along’s motto: 316 days until Christmas 😛

Auf Deutsch:
Auch wenn das link-in schon lange geschlossen ist und man das hier wohl kaum noch als verspätete Zieleinfahrt werten kann, ich habe diesen Sew-Along zweisprachig gestartet, dann sollte ich auch noch ein paar Worte auf deutsch über den Abschluss dieser Odyssee verlieren:
Mitverfolgen konntet ihr den Werdegang dieses Kleides bis Mitte Dezember, da hatte ich Rock und Oberteil als Basis fertig. Alle Anpassungen waren vorgenommen und auch das mit dem Karomuster hatte sich als machbar erwiesen. Warum es jetzt trotzdem so lange gebraucht hat, um fertigzuwerden (zugegeben, fertig ist es schon seit dem 10. Januar, aber erst am Wochenende konnte ich mich zu schönen Fotos aufraffen)? Schaut es euch an! Das hat mit eleganten, mondänen 20ern nichts zu tun. Rosa Karos mit Samt und Bübchenkragen, was hab ich mir dabei gedacht? Ja, es sieht authentisch aus (nur bei der Saumlänge war ich ein wenig vorschnell, die ist zu kurz), aber nicht schön. Das trägt man wenn man jemandem zeigen will, wie lieb und langweilig man eigentlich ist, bei der zukünftigen Schwiegermutter zum Beispiel. Diese Erkenntnis dämmerte mir bereits während des Nähens, weshalb es als Weihnachtsgarderobe dann nicht mehr zur Diskussion stand und so ergab eines das andere und es brauchte seine Zeit, bis es tatsächlich noch fertig wurde.
Jetzt habe ich ein sehr braves 20er-Jahre-Kleid, dass selbst auf einer Kostümparty bieder wirken würde.
Ich bin daher merkwürdig zwiegespalten, denn abgesehen davon bin ich sehr glücklich, wie gut alles gelaufen ist und dass es einigermassen sitzt.

Naja, bis Weihnachten sind es noch 316 Tage, bis Rosenmontag nur noch 5, auch wenn ich absolut kein Jeck bin, immerhin hätte ich jetzt ein Kostüm.

See you soon, love,

ette


Upcycle your dry bread – Savoury Pudding recipe

After the last post’s matchbox-upcycle, today another 20ies-upcycle-tip for you:

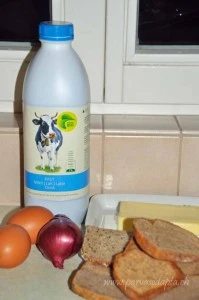
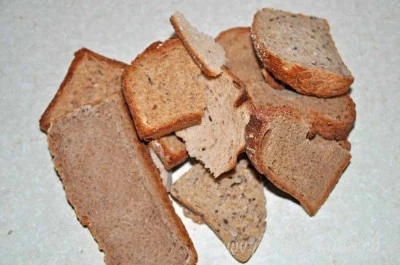
I don’t know about you, but we have this problem with nearly every bread we buy. When we reach the end of the loaf the crust is too hard to eat. Additionally, when my boyfriend works on an early shift he often cuts a slice of bread for me, too. Unfortunately, often enough when I get up I don’t feel hungry at all and in the afternoon help myself to something warm, forgetting the slice getting dry on the counter.

DSC_0071wm

Now you might say: well, why don’t you make breadcrumbs?! Yes, of course I make breadcrumbs, but I can’t use as many breadcrumbs as I am producing, as a vegetarian I don’t eat that much Viennese Schnitzel 😉

But already a while ago I found an amazing recipe in my “Tried favourites” from 1929 (Can’t tell you enough how much I love this book. So many amazing recipes, eager to try more of them. Maybe it is just because it includes all the British classics you won’t find in continental cook books or maybe I just love it for being British).

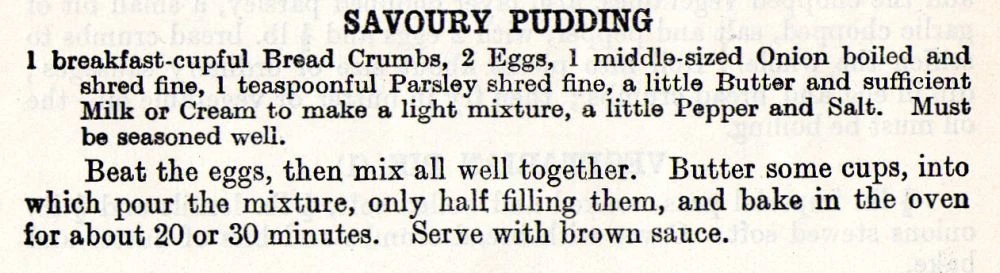
The recipe I found is called “Savoury Pudding”.

Tried favourites 1929, savoury pudding

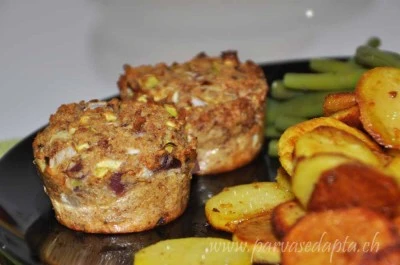
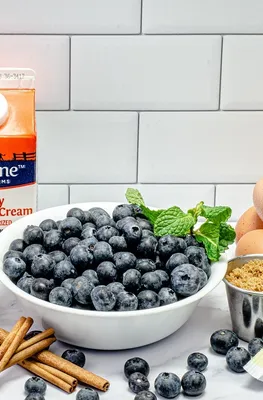
As you see it is pretty straight forward, no fancy ingredients, nothing that could really go wrong. All you have to do is mix the onions and the seasoning with the beaten eggs, add the breadcrumbs (1 breakfast-cup equals 1/2 pint, that is 236,5ml for us living in the metric system) and then add milk until you get a sticky dough. Butter small baking moulds (I use muffin moulds for these) and fill the dough into it, leaving some space as you do with all doughs, the puddings will rise a little. Because electric ovens weren’t common in the 20ies recipes like these don’t give any advise on how hot the oven should be. I always heat it to 180°C using upper and lower heat (idea is that they surely didn’t have convection ovens, so I don’t switch on the fan. Of course, when a recipe is known and save you can change this).

DSC_0072wm

When I first tried it I feared my boyfriend would hate me. Essentially it is just seasoned old bread mixed with onions, eggs and milk, how good could it be? Surprisingly good actually. It doesn’t taste like meat and it doesn’t want to. But the method and the seasoning is the same as when making hamburgers, so it really has a lovely savoury taste. Depending on the bread you use it can be a little darker or include grains, but I like this. The consistency is very moist and soft and with fresh herbs in it, it gets even better (this time I didn’t have any at hand, but threw a little leftover leek into it instead, so it’s not only good for using up old bread).

DSC_0073 (2)wm

To check if it’s ready you can proceed as if baking a cake: prick right into the middle with something long and thin like a wooden skewer, if the dough sticks to it, it needs some more time.
Last question as always, could it be veganized? I think it could. To substitute the milk and the butter wouldn’t be a problem and there are numerous ways how to bake vegan without eggs, the point is to make the dough sticky and the pudding fluffy. I haven’t worked with store-bought egg-replacers yet, but I could even imagine good old apple purée to work well, onions and apples do work very well together so this could even change the flavour into a whole new direction (I will try this next time and tell you, at the moment I somehow have run out of breadcrumbs, oops)

DSC_0074wm

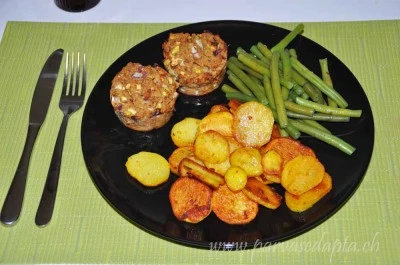
We ate it with green beans and fried potatos, though a thick brown sauce as suggested in the recipe makes it even better.

Hope I made you hungry, see you soon, love

ette

Underneath the Mango tree…

Deutsche Version unten

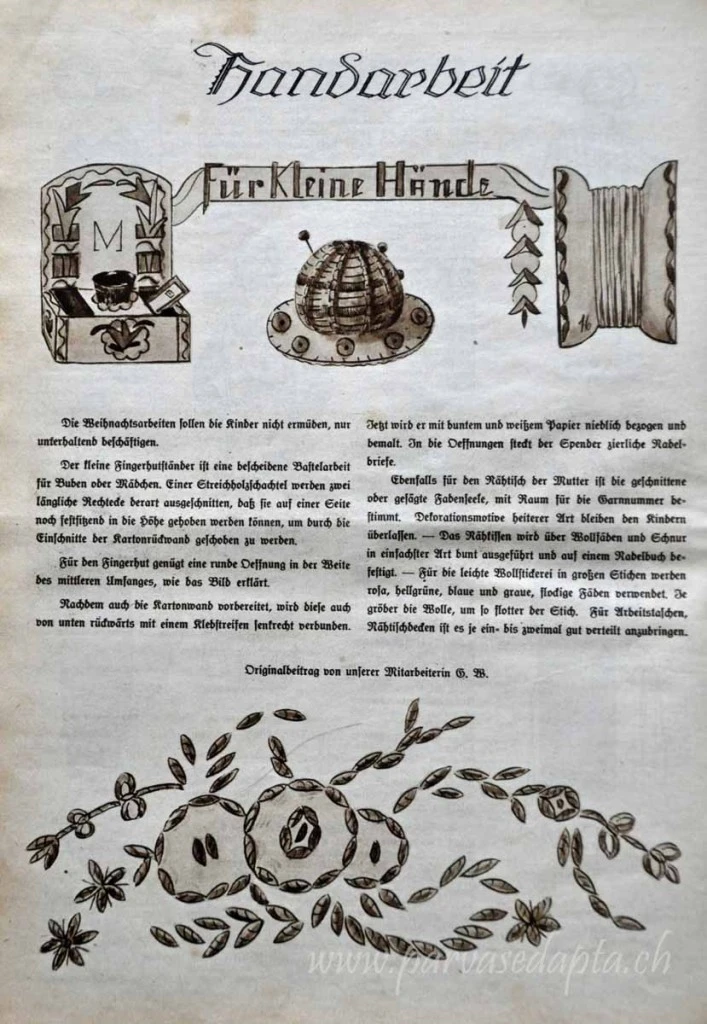
While I flipped through my piles of old paper to find some Christmas images to post last december, I found a very cute tutorial for a little christmas gift idea, a thimble holder. The tutorial was labeled as something easy to be crafted by children to make a little present for their mums.

tutorial thimble holder, parvasedapta.ch
The thing on the left (from: Ringiers Unterhaltungs-Blätter, December 19th 1925)

All you need is some cardboard, an empty matchbox and coloured paper and pencils to decorate.

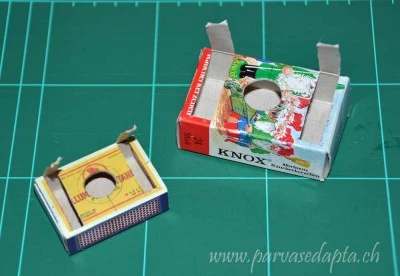
The little thimble holder is a humble craft for boys or girls. Two rectangles are cut into the matchbox in that way, that they stay connected to the matchbox  on one side to be put upright, so that the cardboard-back can be attatched to them through slits. For the thimble a round cutout as seen in the picture is sufficient. After the cardboard-back has been prepared, it is connected to the box with adhesive tape on the back and the bottom. Now it can be decorated with white and coloured paper and painted. In the openings on the sides the donor puts small needle wrappers.

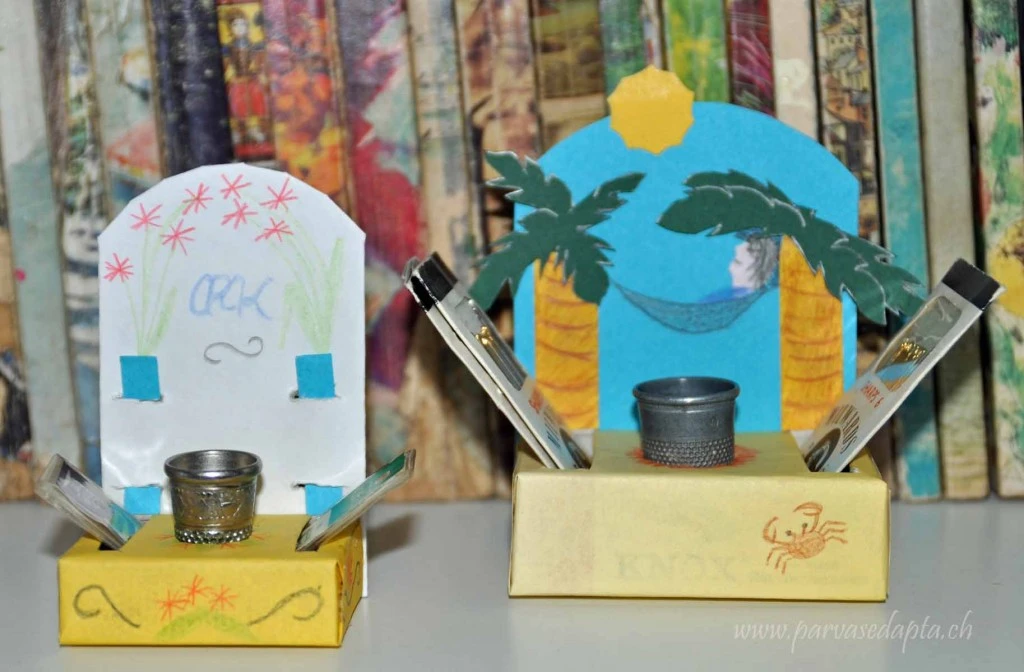
I skipped the adhesive tape and used glue for everything. Today not only suitable for mummies for Christmas, but also as a little present for a good sewing friend.

Well, maybe my expectations were a little high, but it wasn’t that easy as I had thought, working with something as small as a matchbox is tricky even for my small hands, I can’t imagine it being easier with clumsy children’s fingers. Maybe this was meant for children a little older than I imagined.

thimble holder, parvasedapta.ch

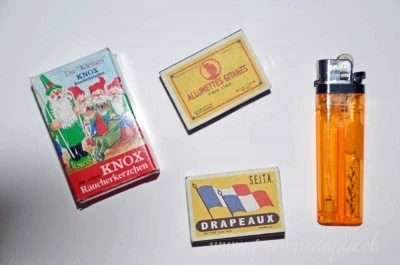
Maybe you wonder why I didn’t post this for Christmas? First because I thought even though it is labeled a gift idea it could be made any time of the year as a random gift. Second because I wanted to try this and had neither time nor matchboxes. Yes, you heard right, all I had were matchbooks or the modern, small matchboxes, but not the old-fashioned large ones. It is easy to buy them at the supermarket by the dozen, but I had enough matches and didn’t want to buy that many more. I finally found a little box only slightly larger than a matchbox and brand-new vintage-styled mini-matchboxes in a hipster-shop (1,50CHF for one single matchbox, really? This is what I do for you!). So my two versions are a little smaller and a little larger than the original size should have been, imagine a size in between 😉

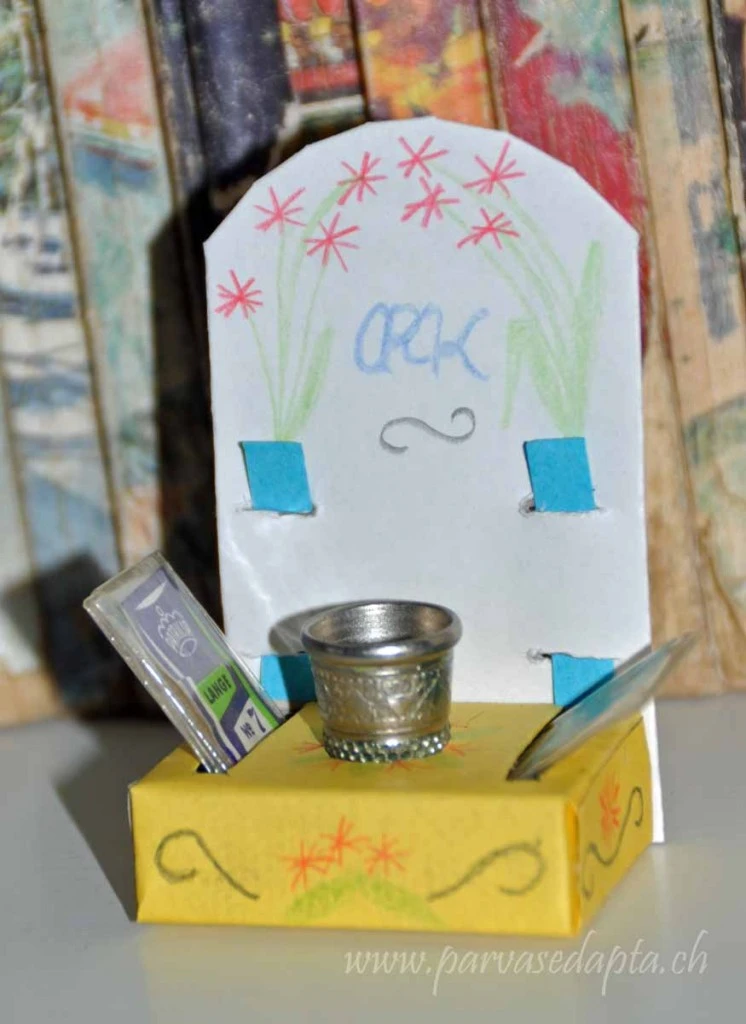
parvasedapta.ch, tutthiholIIparvasedapta.ch, tutthihol

When I was done with the first one it looked indeed like the drawing but I hadn’t been aware until then it strongly resembled a tombstone. Don’t you think? For me this was a quite creepy thought, imagine a child giving some tiny cardboard tombstone to its mother on Christmas eve, with her initials on it?! Maybe I’m making things up and a mother would never see something like this in her offspring’s bricolage, but adore the thimble holder as it is.

thimbleholderIII, parvasedapta.ch

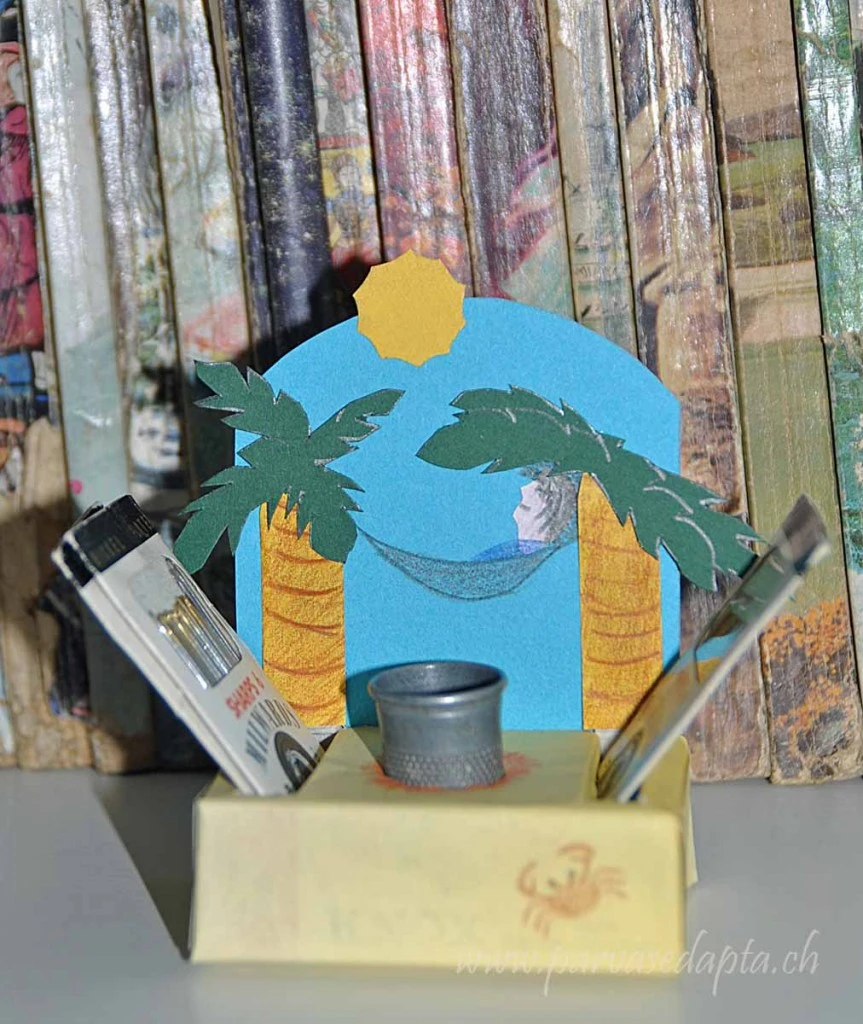
Anyway, I decided to give the second version a completely different design. Maybe it is because I am longing for some warmth, maybe it was too late in the evening and me being ridiculous, this is what my mind came up with:

thimbleholderII, parvasedapta.ch

This time I hid the straps beneath the palm’s trunks. The red around the thimble is meant to be a fire, the thimble being a cauldron with the dinner cooking inside (as I said, it was late).

I don’t know why the original tutorial kept the straps visible, but of course, if you cover the cardboard completely, you could as well hide the straps beneath it and make a design completely independent (but it is interesting to think of designs with them as well, imagine a thimble holder bearing the Spanish coat of arms with the Pillars of Hercules on each side, how very elevated).

Deutsche Version

Als ich kurz vor Weihnachten ein schönes Motiv für einen Weihnachtspost suchte, stiess ich auf diese niedliche Anleitung, eigentlich gedacht für Kinder, um ihrer Mutter eine Kleinigkeit zu Weihnachten zu basteln. Es ist ein kleiner Fingerhut-Halter aus einer Streichholzschachtel, in die Spalten an den Seiten kann man noch kleine Nadelbriefchen stecken.

Weihnachten war dann doch etwas knapp um das noch nachzubasteln, zumal ich keine klassische Streichholzschachtel finden konnte, nur -heftchen oder diese flachen Schachteln. Am Ende fand ich eine leicht grössere Schachtel zuhause sowie eine auf vintage getrimmte Mini-Schachtel in einem Hipster-Laden (für 1,50CHF, pffft).
Die Originalgrösse dürfte also ziemlich genau zwischen meinen beiden Versionen liegen.

Für euch brauch ich die Anleitung ja nicht übersetzen, klickt auf das Bild oben, dann sollte alles gut zu lesen sein.

Das Basteln ging dann recht schnell, allerdings war es doch ziemlich friemelig und ich kann mir kaum vorstellen, dass kleine Kinderhände das ohne Hilfe und Frust basteln könnten (alleine diese Streifen aus dem Deckel schneiden in der Grösse), möglicherweise bin ich da aber auch zu sehr Perfektionist und ein Kind hätte so etwas nicht so schön komplett mit Buntpapier bezogen.
Als ich dann mit der ersten Version fertig war, sah es zwar aus wie auf der Zeichnung, aber irgendwie erinnerte es mich sehr an einen Grabstein. Vielleicht sieht eine Mutter nur die liebevolle Bastelei ihres Nachwuchses, ich sehe wie ein Kind seiner Mutter zu Weihnachten einen Papiergrabstein mit ihren Initialen schenkt. Wie aufmerksam!

Wie auch immer, ich beschloss, das zweite Design sollte ein wenig anders, weniger friedhöflich sein.
Möglicherweise liegt es an dem Sonnenmangel Ende Januar, vielleicht war es auch einfach etwas spät am Abend und ich albern wie ein übermüdetes Kind, heraus kam die “Wie eine einsame Insel sicher nicht ist aber jeder sie sich vorstellt”-Idylle.

Man beachte die roten Dreiecke um den Fingerhut, erkennt man, dass es ein Kessel mit Abendessen über dem Feuer sein soll?

thimble holder, parvasedapta.ch

Man kann sich noch eine Vielzahl weiterer Variationen einfallen lassen, wie beispielsweise diesen geschwungenen oberen Abschluss anders formen, so dass er nicht mehr wie ein Grabstein aussieht. Oder man kann, wenn man wie ich das ganze Ding in Buntpapier wickelt, die Kartonlaschen komplett verschwinden lassen und ist dann ganz frei in seinem Design. Aber mit den Laschen rumzualbern macht auch Spass, warum nicht einen Fingerhuthalter mit dem spanischen Wappen, gehalten von zwei Kartonlaschen den Säulen des Herakles.

Auf jeden Fall finde ich es nicht nur ein niedliches Geschenk für Mütter zu Weihnachten wie es 1925 mal angedacht war, sondern auch ein schönes Mitbringsel für eine nähende Freundin.

Und weil so ein Projekt Erinnerungen an gemütliches Basteln an kalten Wintertagen wach ruft und weil meine grössere Variante dazu passend auch noch ein wenig Sonnenschein verbreitet geht es mit diesem kleinen Papierprojekt zum Krea-Kränzchen von Kaffeeliebelei und Palandurwen, dessen Januar-Motto ganz passend “Warme Gedanken” ist.
Und weil es ja auch ein Upcycling-Projekt ist, darf es auch zum Upcycling-Dienstag im Februar.

See you soon, love

ette

Getrödelt, gefunden, gefreut – Mystery Edition

Deutsche Version unten

It’s the first of the month and as always Frl Swing invites fellow flea market addicts and charity shop haulers to show their latest finds.
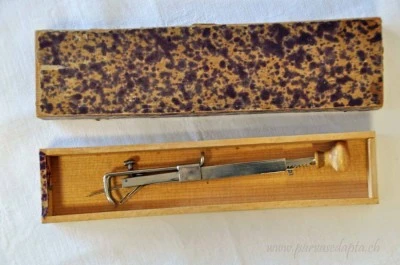
I would like to use this month’s showcase to present a little mystery item, hopefully the online community’s wisdom can help me figure out what it was meant for.

I found it only a few weeks ago on a flea market. When I see boxes I have to open them but most of the time they contain nothing or pens or compasses or stuff like this. So I was pretty surprised, discovering something that at least looked remotely like something to sew with. And for a price of 3 CHF I was willing to take it with me (no, the seller had no idea of its function, either).

DSC_0081wm

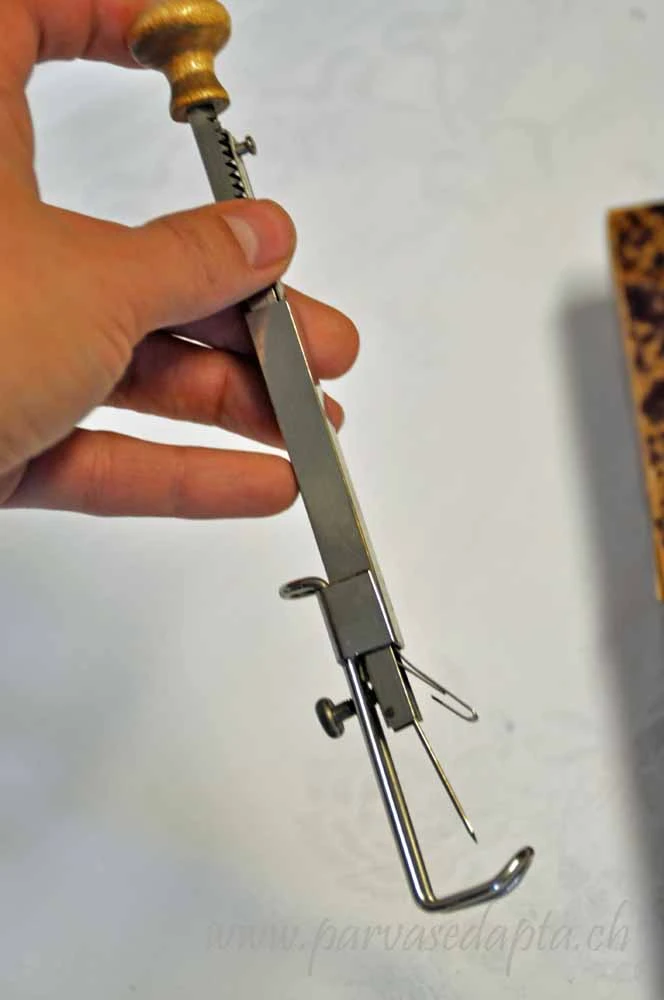
A construction made from metal stick with a wooden knob on top. At the end sits a machine needle, but in a slight angle. Tightly around this stick sits a sleeve with something resembling a sewing foot at its end.

DSC_0084wm

When holding the thing by the sleeve you can press down the knob and the needle goes down through the foot. There is no spring inside, so you have to pull it up again yourself. The little l-shaped thing next to the needle has a little hole in the middle, I suppose you could use it to thread your yarn through it. The screw and the teeth directly below the knob allow to adjust how deep the needle can go down.

My dad and I assume this could be some kind of upholstery tool, maybe to attach buttons to a sofa, but I can’t see how it would exactly work and I wasn’t able to find any information on it online

Have you seen something similar and can help me? I would be so very happy as I would love to know how it works.

Auf Deutsch:

Lieben Dank für einen neuen Monat “Getrödelt, gefunden, gefreut“, liebes Frl. Swing.

Ich möchte dieses Mal eine geheimnisvolle Apparatur vorstellen und hoffe ein wenig auf die geballte Intelligenz des Internets, vielleicht hat ja jemand von euch sowas schon einmal gesehen. Gefunden habe ich dieses “Ding” auf einem Flohmarkt vor ein paar Wochen, hübsch versteckt in der oben sichtbaren Box.

Auf einer Metallstange ist ein Holzknopf befestigt, am anderen Ende wird eine Nähmaschinennadel angeschraubt, allerding in einem leichten Winkel. Vor der Nadel ist noch ein kleines gebogenes Plättchen (was im Bild wie ein “l” aussieht), durch welches man vermutlich einen Faden fädeln kann.  Um diesen Stab herum gearbeitet ist eine bewegliche Hülse, am unteren Ende etwas, was verdächtig nach Nähfüsschen aussieht. Wenn ich das Ding an der Hülse festhalte und den Knopf herunterdrücke senkt sich die Nadel durch dieses Füsschen. Da es offenbar keine Feder im Inneren hat, muss man die Nadel auf dieselbe Weise wieder hochziehen. Mit den Zähnchen unterhalb des Knopfes kann eingestellt werden, wie weit die Nadel durch den Fuss sticht.
Gekostet hat es mich 3Fr., auch weil der Verkäufer selber keine Ahnung hatte, was es sein könnte.

Mein Vater und ich mussten beide an Polsterarbeiten denken, er hatte die Idee, dass man damit vielleicht Knöpfe an einer Rückenlehne oder so annähen kann, auch wenn die genaue Arbeitsweise dann immer noch unklar bleibt. Zudem habe ich im Internet keinerlei Informationen finden können, die diesem Ding auch nur ansatzweise nahe kommen.

Habt ihr so etwas schon einmal gesehen oder wisst, wofür es gut sein könnte? Ich würde mich sehr freuen, etwas über dieses Schätzchen herauszubekommen und es vielleicht sogar einmal auszuprobieren. 

DSC_0080 (2)wm

See you soon, love

ette

In the wee small hours of history

parvasedapta.ch-bronze age shirt

Let’s have something unusual today 😉

Maybe you wonder, remembering I said I don’t want to publish modern projects on this blog? Well, you are absolutely right about what I said and absolutely wrong if you consider today’s project being something modern.

parvasedapta.ch-bronze age shirt II

In fact, this is by far the oldest and most antique project I have ever made or shown.
Before you are too confused now: We are talking about the shirt, not the skirt 😉
The first time I saw this pattern was in 2012, I discovered it in a book on prehistoric textiles in the library of the musée des tissus in Lyons.  I copied the pattern to try it back home (unfortunately without noting in which book I had found it. That really is a pity because until today it is the only version of this pattern I know that comes with measurements).

parvasedapta.ch-bronze age shirt back

Only later I realized I owned a book myself that had the pattern in it.* And among Archaeologists it is pretty well known: This blouse was found in numerous women’s and girl’s graves dating from the bronze age. For example it formed part of the clothing worn by the Egtved girl who died around 1370 b.c., though the skirt that was found as well is today much more famous than the blouse.

parvasedapta.ch-Bronze age shirt back II

What fascinated me about this bronze age pattern, was that it was cut from only one piece of fabric.  Today it is assumed that the special cut and the sizing of the blouse can be connected to fur- and leather-sewing-techniques of the time. Considering you only need a piece of fabric measuring 110cm x 60cm this seems quite plausible as it should be a size you could easily cut from a cow’s or a stag’s skin. The blouses found were however made from woven fabrics.

parvasedapta.ch-Bronze age shirt III

You can find a scheme of the pattern here, just scroll down to the end of the page, here you have a perspective drawing that could help you understand how it is assembled. And finally, shows the outlines from the different blouses found (the link to the original source unfortunately doesn’t work). The pattern and the measurements I copied back in Lyons (and therefore the ones I used for making this blouse) were taken from the example in the middle, the Borum Eshøj-blouse. What you see is that most of the preserved blouses have an additional strip sewn onto the lower edge of the main part, like this it was possible to adjust the hemline even if the width of the fabric or the skin wasn’t enough. The strip found on this blouse was 5cm wide, I made mine much wider and doubled it so it would give a little structure to the blouse (the fabric I used is very thin and unlike the heavy cloth used 3000 years ago). If made narrower (or directly added to the pattern and cut in one piece, as today a width of more than 60cm should be that much of a problem) it could pass for a very modern shirt as they were very en vogue last summer. And the length of the sleeves is adjustable as well. The version above was made with a 30cm wide neck opening while the sleeves each measure 40cm from the neckline to the hem (therefore the 110cm I talked of above).  Making a version with longer or shorter sleeves would be perfectly easy.

The fit is not as bad as you could imagine. Because of the lack of a proper seam underneath the sleeves you can’t insert gussets, but that is not that big a problem because the blouse should be pretty wide, unlike mine which is in fact too small (sits a little tight, breathing isn’t that good an idea when wearing it). But this was because I started to work with the measurement taken from the original (80cm bust circumference *cough*), planning to adjust a second version to my size. Haven’t made this second version so far, so you get to see the too small first version today.

parvasedapta.ch-Bronze Age shirt IV

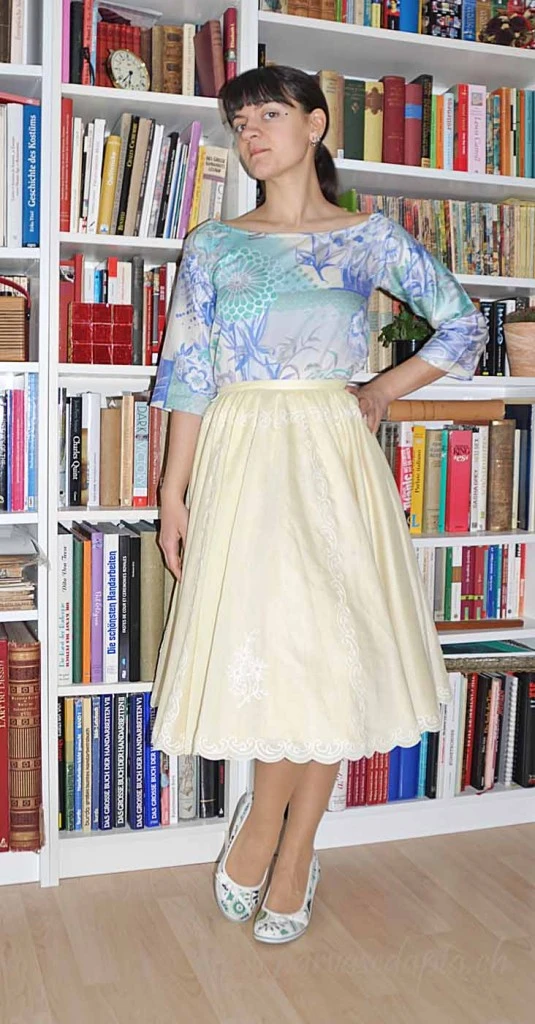
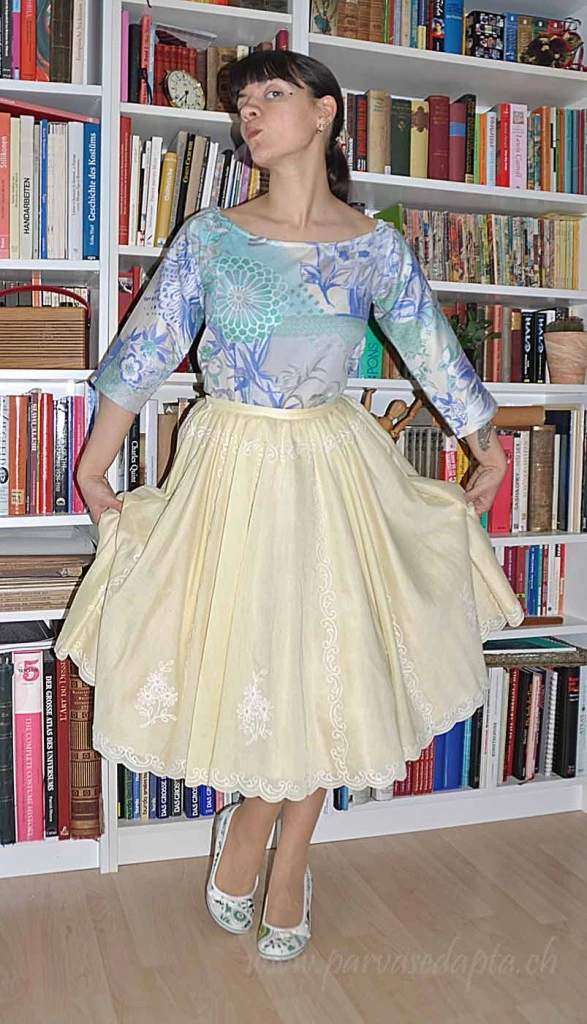
And look, it could very well pass as a vintage pattern, don’t you think?

I love this pattern because it is quite simple to make (only the seam allowances have to be comparably narrow), very very old but absolutely timeless in its style. Imagine this in a brown wool and you surely have some kind of prehistoric garment. Use a patterned viscose as I did and it looks like a summer blouse that hides its historic background perfectly. Keep in mind that you have some seams in the back when chosing the fabric, otherwise it might look odd, cutting through a large motif.

But to me this project is still one of the best examples of how simple a sewing pattern can be and how important the fabric and its pattern is when it comes to the impression a garment gives.

parvasedapta.ch-Bronze Age Shirt V
1st outfit: skirt: edc – shoes: G-Star, 2nd outfit: skirt: ette – shoes: Limelight

I am participating with this post in Idle Needle’s “Make, Thrift & Tell” January challenge (Patterns). It is a lovely idea and she is having a link party over at her blog!

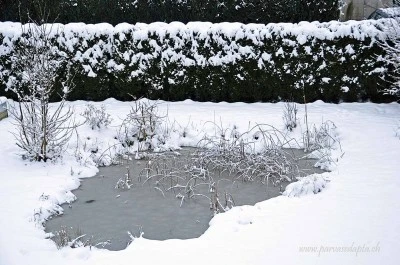
To finish with: The post’s title came to my mind when I looked out of the window the morning I wrote the post (yesterday, so tuesday) and had Sinatra’s in my head immediately.  Unfortunately the photos I made directly afterwards were all blurry, so I can only show you the scenery in bright daylight (imagine this only lit by a small street lamp).

parvasedapta.ch-snowy garden

This is how the garden looks today. At least somebody in the house appreciates snow (I don’t really), our landlord’s dog, caught in full speed:

parvasedapta.ch-dig in the snow

See you on sunday, love

ette

* From this book I also drew all the archaeological information given in this post:
Karin Grömer: Prähistorische Textilkunst in Mitteleuropa. Geschichte des Handwerkes und der Kleidung vor den Römern, Wien 2010.


My new series – My new sewing machine!

For quite some time I have had a little idea working in my mind. I mentioned it very shortly in my post about my new old Bernina 730, but I wanted to be prepared for the series to start before I really announce it. But finally here it comes.

As I have said in the above-mentioned post, I love old sewing machines. I love to imagine how the previous owners worked with them, what dresses were created on them, how the rooms they stood in looked like and so on. My Singer Featherweight had a little handwritten note attached to the sewing table with some old adhesive tape, I was so sad when the mechanic who maintained it last year removed it without even asking me.

Now, my idea: I don’t want to leave it at speculating what could have been back then, but try to re-imagine the original environment of my sewing machines as accurately as I can.

logoneutral

First step would be to narrow down the manufacturing date, the older the machine, the more difficult this will be, I fear. Next step is to find information about this time period. How would the world look like, which people were famous, are there important dates in history connected to it? What did the first owner possibly wear, what was eaten at lunchtime, how much did she (or he) pay for the sewing machine. And, third step: What would be sewn on it when it was new? What pattern styles were popular, what fabric would have been considered modern, what could have been the first project made with the new helper.

I plan to make a little series, including the ideas above, featuring each one of my machines. I don’t plan to make it a regular feature, but will post it whenever a project matches.
If you own a more or less old machine yourself and want to participate, I would love it! Please feel free to use the icon above and link back to my blog. There are no period restrictions, I am equally open for late 19th century creations or early 1990ies projects.
You can include whatever you want. Dates, facts, photos, recipes, everything you consider helpful to create an image of the time given. But you will have to include a sewing project and it has to be made on the sewing machine presented! Yes, this is the mean part. Feel free to create a breathtaking art-nouveau-gown, but create it only on your period machine, no serger, no zig-zag-stitching, no computer-backed embroidery, you get it 😉

So, are you with me?

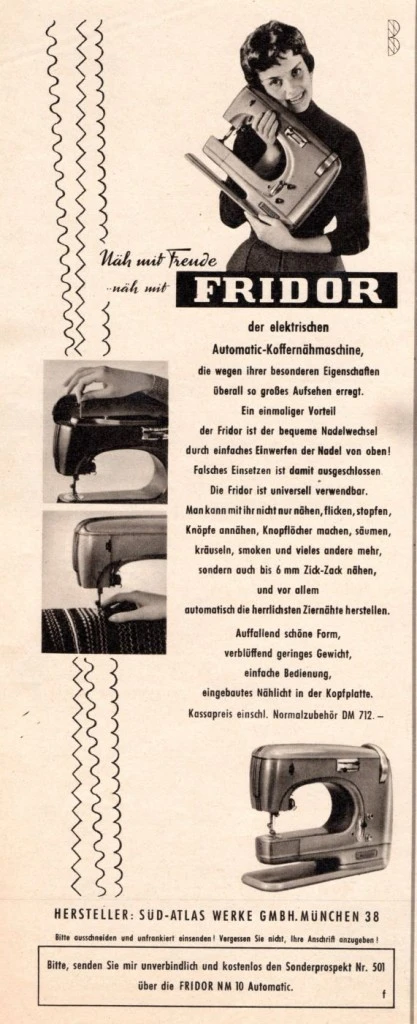
And if someone is interested: This cute but hilarious image above I cut from a sewing machine add found in the Burda-issue of march 1956. I just love how she hugs this presumably quite heavy machine.  The add is for Frigor-Sewing machines, a brand I had never heard of before. It seems as if they produced radios and things like that until 1952, then went bankrupt. From 1953 what seems to be the same enterprise, produced sewing machines. I found Hague (Netherlands) and Munich (Germany) as production sites, but one machine on ebay had a plague saying “licensed in Switzerland, produced in France”.  My otherwise always helpful book on old sewing machines can’t add any more information and even the world wide web proofed not fruitful at all.

img025
The machines have a very distinct, “atomic” 50ies style and are very reasonable priced if you want to buy them today, something around 50€ if you find one. Back in the 50ies this was in fact a comparably expensive machine. The add from 1956 names a price of 712 Mark, this equals nearly 1700€ today! But it seems to have had some fun features, too. It was already able to sew straight and zig-zag, to darn, to make buttonholes and attach buttons and even had some decorative stitches. But the best thing, look at the upper picture on the left:You didn’t have to change the needle as we know it today but, to prevent confusion on how it should be placed, you could just throw the needle into a little hole on the top and it fell into the right position all by itself, magic!

I hope you will like this little series and I would love if someone decides to join me. Stay curious for the first post, see you soon,

ette